


Autumn is the perfect excuse to give your front porch miniature garden a refresh. Swap out summer’s sun-faded pieces for something with a little more personality — mossy stepping stones, thrifted lanterns, and hand-painted rock pumpkins arranged with a bit of intention instead of just tossed together. A weathered bench makes a great anchor for the scene, with taller pieces layered in behind it. Where you put it all matters just as much as what you use.
Clear Out Your Summer Miniature Garden First

Before you add a single pumpkin, start by stripping your miniature garden back down to its bones. This is more of an edit than a full teardown — pull out the faded florals, sun-worn figurines, and anything that still screams summer, but hang onto a few anchor pieces like a weathered bench or a mossy stepping stone to keep some continuity. A lot of those warm-weather pieces probably came from your summer backyard decor collection anyway, so they’re easy to box up and save for next year.
Keeping a few familiar pieces means the space won’t feel completely unrecognizable once the fall additions show up. Think of it as pruning rather than gutting — you’re just clearing room for pumpkins, thrifted finds, and a few spooky new touches.
Hunt for Thrifted Halloween Decor Under $1

Once your miniature garden is stripped back, it’s time to head to a few local thrift shops to hunt for tiny, autumn-friendly props. You’d be surprised how many charming Halloween-adjacent pieces show up in the dollar bins — often for less than a dollar each, if you’re patient and willing to dig.
Small fences, tiny lanterns, and little figurines all work well, as long as they’re scaled to fit your existing garden. This kind of shopping rewards patience more than a big budget — the best finds are usually tucked on a bottom shelf, not front and center.
Treat secondhand stores as part of your design toolkit rather than a last resort, especially for whimsical, budget-conscious displays. If you like what you find, those same thrifted pieces can inspire a full Halloween porch decor refresh for the entrance itself, not just the mini garden.
More Finds You Might Like

👻Premium Material Skeleton Decor: Halloween body skeleton is made of high quality plastic and fixed by screws, The hands and feet can be flexibly folded, used for a long time.

EXTRA LARGE REALISTIC WINGS:Extra Large 34" fairy wings adult women Dark with 6-wing butterfly design. Ideal adult size fairy wings for forest fairy wings fantasies (4ft+ height). Girls fairy wings option available. Iridescent wings create ethereal shimmer.

Unique Halloween Decoration: Our Halloween pumpkin lantern light can emit warm light with 360° beam angle, adding atmosphere to your Halloween night. Push and pull to turn on and off the light, and when it lights up, it will show a huge pumpkin smiling face. The design is ingenious and interesting, it is also an eye-catching decoration for Halloween parties
Paint Rock Pumpkins for Spooky Charm

You really only need a handful of smooth rocks, some orange craft paint, and a fine-tipped brush to turn plain stones into little pumpkins. It’s one of those projects that costs almost nothing but still looks intentional once it’s done.
A few smooth rocks and a little orange paint go further than you’d expect — this is one of those projects where resourcefulness beats a big budget every time.
A few reasons this one’s worth doing:
- Low waste: You’re repurposing rocks you’d otherwise step over, and it’s a nice way to teach kids about reusing what’s around.
- Easy for little hands: Small brushstrokes and simple color blending make this a good project for kids to practice fine motor skills.
- No two are the same: Since each rock is a little different, every pumpkin ends up looking unique instead of mass-produced.
Once they’re dry, these little painted rocks become the anchor of your fall display — and they don’t cost you much beyond a bottle of paint. When the season’s over, the same stones can easily get repainted for a spring garden refresh instead of getting tossed.
More Finds You Might Like

Proudly permanent ink marks on paper, plastic, metal, and most other surfaces

Food Grade Kitchen Accessories: Soft and flexible funnels for kitchen use. Heat resistant -40°C to 250°C, No need to worry that the old plastic funnel may damage the health of your families.

【Versatile Dual-Tip Design】: Unleash your creativity with our acrylic markers featuring a unique dual-tip design. The extra-fine tip is perfect for intricate details, while the brush tip allows for expressive brushstrokes. From delicate line work to bold sweeps, these markers adapt effortlessly to your artistic vision.
Arrange Your Halloween Miniature Garden Display

Once your painted pumpkin rocks are ready, start arranging them alongside any leftover summer greenery and thrifted trinkets you’ve collected. Every piece should earn its spot based on scale and how well it fits the season.
A little layering goes a long way here — put taller pieces toward the back and let the pumpkin rocks cluster in front, so the whole thing reads like a mini harvest patch instead of a flat row of objects.
Stick to odd numbers when you can. Three or five pumpkins tend to look more natural than an even, symmetrical pair — it’s a small trick, but it makes a real difference.
If you want to carry the theme further, pairing this display with a few pieces of Halloween entryway decor helps tie the whole approach to your front door together.
Once everything’s arranged, move the display near the front door and set it up at eye level, so people actually notice the details instead of walking right past it.
More Finds You Might Like

Buildable chrysanthemum artificial flower decor - Take quality time out or join friends and family for a mindful project with the LEGO Icons Chrysanthemum building set for adults
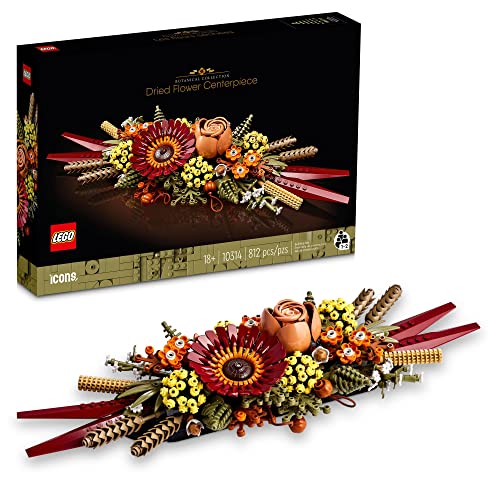
Cultivate Creativity – Build and display a beautiful LEGO Icons Dried Flower Centerpiece (10314) with this mindful building project for adults. Inspire creativity and imagination with this unique flower kit.

SUPER VALUE PACK. Add a cute and spooky atmosphere to your Halloween with our flying ghost Halloween decoration. You will get 7 Pcs 19.6 inch white hanging ghosts with 7 different designs.
Choose the Best Spot for Your Miniature Garden

All that painting and arranging only pays off if people can actually see it — a miniature garden tucked into a dark corner loses most of its charm. Try positioning the display up higher, near the front door, so it catches the eye the moment someone walks up. That one change turns a small craft project into real curb appeal. Once fall wraps up, that same elevated spot works just as well for festive Christmas decor, so the space keeps earning its keep year-round.
The short version: keep it near the front door, up high, somewhere the light and foot traffic won’t miss it.
A few things worth thinking about before you settle on a spot:
- Eye-level visibility: A railing or plant stand works better than the ground for making sure the details actually get seen.
- Natural light: Morning or afternoon sun brings out the painted details without washing out the colors.
- Foot traffic: Spots near the entryway naturally get more attention from visitors.
More Finds You Might Like

1.Material: ABS Pearl.Beads Size: 3mm To 9mm mixed

【Preferred high-quality bamboo】The entryway shoe rack is made of eco-friendly bamboo for an elegant look and very durable. After high temperature carbonization,not easy to crack and deform. Due to the properties of bamboo, bamboo boards are stronger and last longer than wood. In addition, bamboo is a renewable resource and is naturally environmentally friendly.

>7-Pots Plant Stand: Featuring a ladder design that allows unobstructed sunlight, this plant rack accommodates more than 7 pots, making it an ideal decorative piece for organizing your plant collection. Suitable for both indoor and outdoor use.
Try New Miniature Garden Themes Next Halloween

There’s no reason to stop at painted pumpkins — this same formula works for almost any season. Swap out the old pieces, hit a couple of thrift shops, paint a few rocks, and you’ve got a fresh little scene in an afternoon.
Next year, try a harvest theme with tiny hay bales, a winter version with frosted pinecones and mini evergreens, or a spring take with painted rock ladybugs tucked among small flowers.
The formula stays the same no matter the season: rotate pieces, keep the budget low, and let the arrangement guide itself. For Halloween specifically, adding a few walkway decor touches like tiny lanterns or mini tombstones can tie the mini garden into a bigger themed display leading up to your door. Each new theme keeps the porch feeling fresh instead of the same setup year after year.
Frequently Asked Questions
What Type of Paint Works Best for Outdoor Rock Pumpkins?
Acrylic craft paint holds up best outdoors, especially once you seal it with a clear weatherproof topcoat. That combination handles rain and sun without fading much, so your rock pumpkins stay looking good all season.
How Do I Keep Painted Rocks From Fading in Rain?
A clear outdoor sealant spray is your best friend here. Let the paint dry fully, then apply two thin coats of sealant — that extra layer protects the color from rain and sun so your pumpkins don’t fade halfway through the season.
What Size Container Works Best for a Miniature Garden?
Something in the 12–18 inch range gives you enough room to layer pumpkins and thrifted pieces without the display looking cramped, while still being compact enough to elevate near your entryway.
Can I Reuse the Same Rocks for Multiple Holidays?
Definitely — that’s one of the best parts of this project. Just repaint the same rocks between seasons and they can go from pumpkins to snowmen to Easter eggs, so one small stone collection can carry you through the whole year.
How Long Does a Miniature Garden Display Typically Last Outdoors?
Most displays hold up well for four to six weeks outdoors, depending on your climate. Weatherproofing your painted pieces and picking a somewhat sheltered spot will help it last the whole season.
Conclusion
Your porch miniature garden doesn’t need a big budget or a lot of time to feel completely refreshed for fall. A few thrifted pieces, some hand-painted rocks, and a little thought about placement is really all it takes. Once the season winds down, pack up your favorite pieces and you’ll have a head start on whatever comes next — winter, spring, or right back to Halloween next year.


