


Funny enough, I started rethinking my morning routine the same week my doctor mentioned hydration matters more than I’d assumed. What you drink first thing shapes your digestion, energy, and focus before breakfast even happens. I’ve tested warm lemon water, cold brew, electrolyte drinks, and stranger options like celery juice, and the differences surprised me. Some of what I discovered might change your mornings completely.
Start Hydrated: Homemade Electrolyte Drinks for Your Morning

Starting your morning with a homemade electrolyte drink is one of the simplest and most effective ways to rehydrate your body after a long night of sleep.
While commercial sports drinks are widely available, they’re often packed with artificial colors, excessive sugar, and synthetic additives that your body simply doesn’t need first thing in the morning. Making your own electrolyte drink at home gives you complete control over the ingredients while delivering the sodium, potassium, and magnesium your cells crave.
This recipe uses natural ingredients that work together to replenish lost minerals and provide a gentle energy boost without relying on caffeine. The combination of citrus juice, honey, and a pinch of sea salt strikes the perfect balance between palatability and function.
It comes together in under five minutes, making it an effortless addition to any morning routine regardless of how busy your schedule might be.
- 2 cups filtered water
- Juice of 1 large lemon
- Juice of 1 orange
- 1/4 teaspoon fine sea salt
- 1/4 teaspoon cream of tartar
- 1 tablespoon raw honey
- 1/4 teaspoon magnesium powder (optional)
Pour the filtered water into a large glass or mason jar, then add the freshly squeezed lemon juice and orange juice directly into the water, followed by the sea salt, cream of tartar, and raw honey, stirring vigorously with a long spoon until the honey is completely dissolved and all ingredients are fully incorporated.
If using magnesium powder, add it last and stir again until no clumps remain. Serve immediately over ice or at room temperature depending on your preference.
For best results, drink this electrolyte blend within 30 minutes of waking up, ideally before consuming any food, as this allows the minerals to absorb more efficiently on an empty stomach.
If you find the taste too tart, gradually increase the honey until you reach your preferred sweetness rather than reducing the citrus, since the acidity plays an important role in mineral absorption.
You can also prepare a double or triple batch the night before and store it in a sealed glass jar in the refrigerator for up to 48 hours, though a quick stir before drinking is recommended since settling may occur. To further enhance your morning wellness routine, pairing this drink with an essential oil diffuser can help create a calming atmosphere that sets a positive and refreshing tone for the rest of your day.
Lemon Water to Kickstart Your Morning Digestion

Lemon water is one of the oldest and most straightforward morning rituals in natural health, yet its simplicity is precisely what makes it so powerful.
When you drink warm lemon water first thing in the morning, you’re giving your digestive system a gentle nudge to wake up and begin producing the enzymes and bile it needs to process your first meal of the day. The warmth of the water stimulates peristalsis, the muscular contractions that move food through your intestines, while the citric acid in the lemon encourages the production of stomach acid and digestive juices that are naturally lower after hours of sleep.
Beyond digestion, lemon water provides a modest but meaningful dose of vitamin C, a powerful antioxidant that supports immune function, skin health, and iron absorption. Unlike the electrolyte drink described previously, this preparation requires virtually no preparation time and almost no ingredients, making it the most accessible option for anyone who struggles with elaborate morning routines. The key to getting the most out of this drink lies in using fresh lemons rather than bottled lemon juice, as bottled varieties are often pasteurized and stripped of the beneficial enzymes and volatile compounds that make fresh lemon juice therapeutically valuable.
- 1 to 2 cups filtered or spring water
- Juice of half a fresh lemon
- 1/8 teaspoon raw honey (optional)
- 1 small pinch of cayenne pepper (optional)
- 1 thin lemon slice for garnish (optional)
Heat the filtered water in a small saucepan or kettle until it reaches a warm but not boiling temperature, ideally between 98 and 105 degrees Fahrenheit, since water that’s too hot will destroy the vitamin C and enzymes in the lemon juice, while cold water requires more digestive energy to process first thing in the morning.
Once the water has reached the appropriate temperature, pour it into a glass or mug, then cut your lemon in half and squeeze the juice directly into the warm water using either a hand juicer or your fingers, being careful to catch any seeds before they fall in.
If using honey, add it now and stir gently until dissolved, then add the cayenne if desired and stir once more before drinking slowly over the course of five to ten minutes.
Rolling your lemon firmly against the countertop with the palm of your hand for ten to fifteen seconds before cutting it open will break down the internal membranes and allow you to extract considerably more juice with less effort, which is especially useful in the morning when energy is still low.
Drinking through a reusable straw is strongly recommended because the citric acid in lemon juice, when consumed regularly, can gradually erode tooth enamel if it repeatedly contacts your teeth directly. If you’re sensitive to acidity, starting with just a quarter of a lemon and gradually increasing the amount over several weeks will allow your stomach to adjust without causing discomfort or acid reflux, and you should always wait at least twenty to thirty minutes after finishing your lemon water before brushing your teeth to avoid scrubbing softened enamel. For those who also enjoy creating a calming atmosphere during their morning routine, pairing this ritual with a fragrance diffuser can enhance the overall sensory experience and set a peaceful tone for the rest of the day.
Apple Cider Vinegar for a Sharp, Metabolism-Boosting Morning

Apple cider vinegar has earned a devoted following in the wellness community for good reason, as this fermented liquid contains acetic acid, beneficial enzymes, and a colony of beneficial bacteria known as the mother, which is the cloudy, web-like substance you’ll notice floating in raw, unfiltered varieties.
When consumed in the morning on an empty stomach, apple cider vinegar has been shown in several studies to help stabilize blood sugar levels, reduce insulin spikes after meals, and support a healthy metabolism by improving the body’s ability to break down fats and carbohydrates throughout the day.
The sharp, acidic nature of the drink also stimulates digestive enzyme production in a manner similar to lemon water, though the fermentation-derived compounds in apple cider vinegar add an additional probiotic dimension that supports gut microbiome diversity over time.
The most important thing to understand before incorporating this drink into your morning routine is that apple cider vinegar should never be consumed undiluted, as its high acidity can erode tooth enamel, irritate the esophagus, and damage the delicate lining of an empty stomach when taken straight.
Always dilute it in a generous amount of water, and consider drinking it through a straw to minimize contact with your teeth.
Choosing an organic, raw, unfiltered apple cider vinegar that contains the mother is essential, as filtered and pasteurized versions have been stripped of the enzymes and probiotic cultures that provide the majority of the health benefits associated with this drink.
Just as investing in a solid wood office desk can meaningfully improve the quality of your daily work environment, committing to a thoughtful morning wellness routine built around purposeful ingredients like apple cider vinegar can meaningfully improve your long-term health outcomes.
- 1 to 2 cups filtered or room temperature water
- 1 to 2 tablespoons raw, unfiltered apple cider vinegar with the mother
- 1 teaspoon raw honey
- 1/4 teaspoon ground cinnamon
- 1 small pinch of cayenne pepper (optional)
- 1 teaspoon fresh lemon juice (optional)
Pour the filtered water into a glass, then add the apple cider vinegar and stir briefly to begin combining the two liquids, followed by the honey, which should be stirred vigorously for at least fifteen to twenty seconds since honey doesn’t dissolve instantly in cool water and requires active agitation to incorporate fully into the mixture.
Add the ground cinnamon and cayenne if using, then add the fresh lemon juice last if desired, as it brightens the flavor and adds a complementary layer of vitamin C and digestive support that pairs well with the vinegar.
Drink the entire glass slowly over five to ten minutes, preferably at least fifteen to twenty minutes before eating your first meal to allow the acetic acid and enzymes time to prime your digestive system for peak performance.
If you’re new to apple cider vinegar drinks, begin with just one teaspoon per day and gradually work your way up to one to two tablespoons over the course of two to three weeks, as starting with too large a dose too quickly can cause digestive discomfort, nausea, or an unpleasant burning sensation in the throat that discourages many people from continuing the practice.
Rinsing your mouth with plain water immediately after finishing the drink is a smart habit that will help neutralize residual acid on your tooth enamel without requiring you to brush your teeth right away, since brushing immediately after acid exposure can actually accelerate enamel erosion rather than prevent it.
People with acid reflux, gastric ulcers, or low potassium levels should consult a healthcare provider before beginning a daily apple cider vinegar practice, as the high acidity may aggravate these conditions in sensitive individuals.
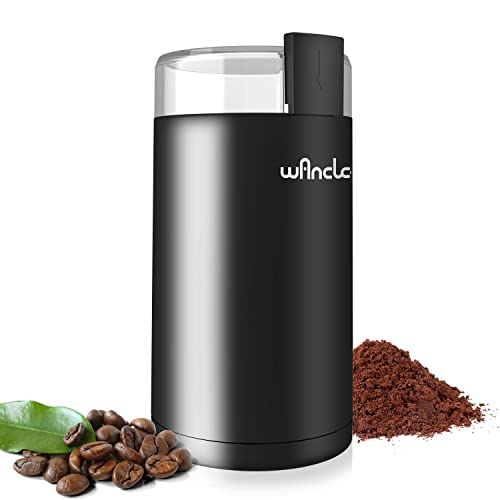
Classic Black Coffee for Pure, Clean Morning Energy

Classic black coffee is one of the most straightforward and rewarding morning rituals a person can adopt, and when prepared thoughtfully, it delivers a clean, focused burst of mental clarity and physical energy without any of the additives, sweeteners, or dairy products that can blunt its natural effects and add unnecessary calories to your morning. The key to exceptional black coffee lies not in complexity but in the quality of the bean and the precision of the brewing process, as a well-sourced, freshly ground coffee bean brewed at the correct water temperature will produce a cup with natural sweetness, nuanced flavor notes, and a satisfying depth that makes sugar and cream genuinely unnecessary rather than simply avoided.
Understanding the science behind why black coffee is such a powerful morning beverage helps explain why so many high-performing individuals swear by it as their preferred way to begin the day. Caffeine works by blocking adenosine receptors in the brain, which are the receptors responsible for signaling fatigue, and in doing so it promotes the release of dopamine and norepinephrine, neurotransmitters that sharpen focus, elevate mood, and increase alertness for several hours following consumption. Black coffee also contains a significant concentration of antioxidants, including chlorogenic acids, which have been linked to reduced inflammation and improved metabolic function when consumed regularly as part of a balanced lifestyle.
- 2 tablespoons freshly ground medium or medium-dark roast coffee beans
- 8 ounces filtered water heated to between 195 and 205 degrees Fahrenheit
Measure two tablespoons of freshly ground coffee per eight ounces of water and place the grounds into your chosen brewing device, whether that’s a pour-over dripper fitted with a rinsed paper filter, a French press, or an automatic drip machine with a clean filter basket, then heat your filtered water to the appropriate temperature, which falls just below boiling at between 195 and 205 degrees Fahrenheit, since water that’s too hot will scorch the grounds and introduce bitterness while water that’s too cool will under-extract the coffee and leave the cup tasting flat and sour.
If using a pour-over, begin with a small bloom pour of about twice the weight of the coffee grounds in water, allowing the grounds to degas for thirty seconds before continuing with the remaining water in slow, steady circular pours, completing the full brew within three to four minutes for prime extraction.
Grinding your coffee beans immediately before brewing rather than using pre-ground coffee is the single most impactful change you can make to the quality of your cup, as ground coffee begins losing its volatile aromatic compounds within minutes of being exposed to air, meaning that pre-ground coffee sold in bags has already shed a considerable portion of the complexity and brightness that makes fresh coffee so satisfying.
Store your whole beans in an airtight container away from heat, light, and moisture, and never store them in the freezer or refrigerator as the fluctuating temperatures and ambient moisture will degrade their quality rapidly and introduce unwanted flavors into the finished brew. Pairing your morning coffee routine with a well-lit workspace can further enhance your focus and productivity, and a premium table lamp positioned near your brewing station or desk creates an inviting atmosphere that makes the ritual of preparing and enjoying black coffee even more intentional and rewarding.
Shop This Look

One bag of 2.2lb Lavazza Espresso Barista Gran Crema Whole Bean Coffee Blend
✅【A Secret To Grind Bean Effortlessly】Grinder comes with a pure copper motor and stainless steel blade. Easily observe the grinding situation by a transparent lid, extract the perfect flavor from beans. let you enjoy great coffee in a few seconds.
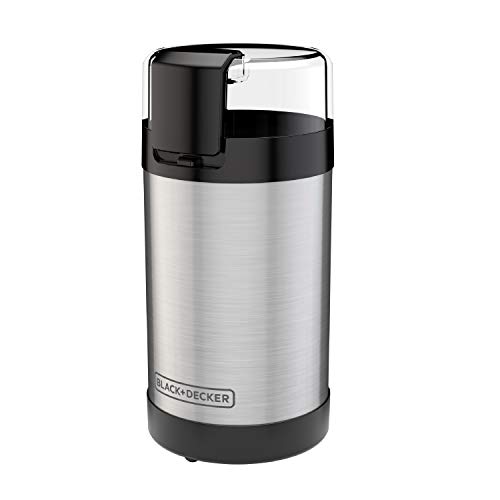
STAINLESS STEEL BLADES AND BOWL - The sharp blades and durable grinding bowl are built to last, delivering uniform grinds with every use
Cold Brew Coffee for a Smoother Morning Caffeine Kick

Cold brew coffee has earned a devoted following among morning coffee drinkers who find traditional hot brewing methods produce a cup that’s too acidic or too bitter for their taste, and the reason cold brew delivers such a noticeably smoother, mellower drinking experience comes down to basic chemistry. When coffee grounds are steeped in cold water over an extended period rather than exposed to hot water for a short time, the extraction process draws out different compounds from the bean, leaving behind many of the harsh acids and bitter oils that hot water aggressively pulls from the grounds in minutes. The result is a concentrate that’s naturally sweeter, rounder in flavor, and remarkably gentle on the stomach, making it an excellent choice for anyone who loves coffee but has experienced acid reflux or digestive discomfort after drinking hot-brewed versions.
Beyond its gentler flavor profile, cold brew offers a practical advantage that suits the rhythms of a busy morning routine exceptionally well, since the concentrate is prepared the night before or over the weekend and stored in the refrigerator, meaning your morning simply requires pouring rather than measuring, heating, and waiting. The caffeine content in cold brew is also notably higher than in a standard cup of drip coffee when the concentrate is consumed undiluted, though most people dilute it with water or milk at a one-to-one ratio to bring it to a comfortable drinking strength, which still delivers a sustained and satisfying lift in energy and focus without the sharp spike and crash that some people experience from hot coffee consumed on an empty stomach.
- 1 cup coarsely ground medium or dark roast coffee beans
- 4 cups cold filtered water
- Large mason jar or pitcher with lid
- Fine mesh strainer
- Cheesecloth or paper coffee filter
Combine the coarsely ground coffee and cold filtered water in a large mason jar or pitcher, stirring gently to make certain all of the grounds are fully saturated, then seal or cover the container and place it in the refrigerator for a minimum of twelve hours and up to twenty-four hours, with longer steeping producing a richer, more concentrated result that some drinkers prefer. Once the steeping period is complete, pour the mixture slowly through a fine mesh strainer lined with cheesecloth or a paper coffee filter set over a clean pitcher or large jar, allowing gravity to do the work without pressing or squeezing the grounds, which can introduce bitterness into the otherwise smooth concentrate, and once fully strained, seal the concentrate and store it in the refrigerator for up to two weeks, serving it over ice diluted with an equal part of cold filtered water, milk, or a milk alternative according to your preference.
One important detail that dramatically affects the final quality of your cold brew is the coarseness of your grind, and using a grind that’s too fine will clog your straining materials and introduce unwanted sediment and bitterness into the concentrate even after filtering, so erring on the side of coarser than you think necessary will produce a cleaner, more refined result. It’s also worth experimenting with your coffee-to-water ratio, as the standard one-to-four ratio suggested here produces a moderately strong concentrate suitable for diluting, but enthusiasts who prefer a bolder, more intense cup often use a one-to-three ratio and adjust the dilution at serving time to fine-tune the strength to their liking. Just as a floating vanity cabinet can transform the look and feel of a bathroom by freeing up floor space and creating a cleaner, more open environment, cold brew can transform your morning routine by simplifying the process and delivering a consistently satisfying result with minimal daily effort.
Shop This Look
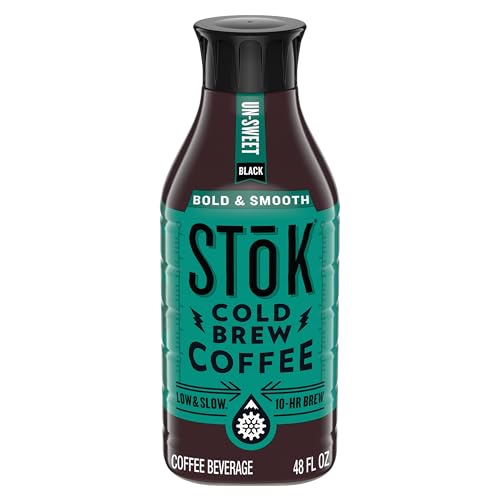
Bold & Smooth Cold Brew: 48 fl oz bottle of black and unsweetened SToK Cold Brew; 125 mg of caffeine per 12 oz pour

CAFÉ-QUALITY ESPRESSO: Experience the intense, rich flavor of NESCAFÉ Gold Espresso Intense with café-style crema for a velvety, smooth taste

Indulge in Café-Inspired Perfection: Our master blenders and roasters have balanced arabica coffee with subtle notes of nuttiness and cocoa for a taste that has both depth and everyday drinkability
Bulletproof Coffee for a High-Fat, High-Focus Morning Start

Bulletproof coffee emerged from the biohacking community and quickly found a passionate audience among those following ketogenic, paleo, or low-carbohydrate diets, and its appeal lies in the idea that blending high-quality fats directly into your morning coffee creates a drink that fuels the brain, suppresses appetite, and provides steady energy throughout the morning hours without the blood sugar fluctuations that come from pairing coffee with a carbohydrate-heavy breakfast.
The concept was popularized by entrepreneur Dave Asprey, who combined the Tibetan practice of drinking butter tea with modern nutritional thinking around medium-chain triglycerides, or MCTs, which are fats that the body converts into ketones relatively quickly, offering the brain an efficient alternative fuel source that many devotees report produces remarkable mental clarity and sustained focus.
The key to making bulletproof coffee taste like a rich, frothy latte rather than an oily, separated mess is the blending step, which is non-negotiable and transforms the fats and coffee into a creamy, cohesive emulsion that looks and drinks more like a foamy cappuccino than anything resembling plain coffee with butter floating on top.
The quality of ingredients also matters considerably here, with grass-fed unsalted butter being the traditional choice because it contains a different fatty acid profile than conventional butter, including higher levels of conjugated linoleic acid and omega-3 fatty acids, while MCT oil sourced from coconut oil provides the rapid ketone conversion that gives bulletproof coffee its reputation for mental sharpness.
- 1 cup freshly brewed hot coffee, preferably from high-quality single-origin beans
- 1 to 2 tablespoons grass-fed unsalted butter
- 1 to 2 tablespoons MCT oil or coconut oil
- Optional: 1 teaspoon vanilla extract
- Optional: pinch of cinnamon
- Optional: 1 teaspoon raw honey or a few drops of liquid stevia for sweetness
Brew one cup of strong hot coffee using your preferred method, then pour it directly into a high-powered blender along with the grass-fed butter and MCT oil, starting with the smaller measurements of each fat if you’re new to the drink and working up to larger amounts as your digestive system adjusts to the higher fat content.
Secure the blender lid tightly and blend on high speed for twenty to thirty seconds until the mixture becomes visibly frothy, creamy, and pale in color with a uniform texture throughout, adding any optional flavorings such as vanilla, cinnamon, or sweetener before the final few seconds of blending, then pour immediately into a prewarmed mug and drink right away while the emulsion holds its texture.
First-time drinkers should introduce bulletproof coffee gradually by starting with just one teaspoon of MCT oil rather than a full tablespoon, since MCT oil consumed in large quantities without prior exposure is well known for causing significant digestive distress including cramping and loose stools in people whose digestive systems are unaccustomed to processing concentrated medium-chain triglycerides, and building up the amount over one to two weeks allows the body to adapt comfortably to the higher fat load.
It’s also worth noting that bulletproof coffee is intended to replace breakfast rather than accompany it on days when you’re following an intermittent fasting protocol, and consuming it alongside a full meal defeats the appetite-suppressing and metabolic benefits that most people are seeking from the drink.
Pairing your bulletproof coffee routine with a well-humidified home environment can further support morning focus, since dry indoor air is known to cause mild dehydration and fatigue, and investing in premium humidifiers for your living space helps maintain optimal air moisture levels that complement the cognitive benefits you’re seeking from your morning ritual.
Shop This Look

Organic Coconut MCT Oil - Organic MCT oil sourced from coconuts, delivering medium chain triglycerides with 14 g per serving, including caprylic acid (C8) and capric acid (C10) (1). See Supplement Facts for total fat and saturated fat content.

BRAIN & BODY FUEL: Sports Research MCT Oil is packed with c8, c10 & c12 fatty acids that may help keep the body in a state of ketosis (when your body uses fat as its main fuel source) while providing valuable brain-boosting energy support*

Premium & Highly Ketogenic: Contains one 16-ounce bottle of premium Bulletproof Brain Octane C8 MCT Oil, the purest form of MCT Oil available for the highest quality and longest-lasting energy boost
Mushroom Coffee for a Grounded Morning Alternative to Regular Coffee

Mushroom coffee has emerged as one of the most intriguing wellness trends of recent years, offering a way to enjoy the ritual and mild caffeine kick of your morning cup while incorporating the adaptogenic and immune-supporting properties of medicinal mushrooms like lion’s mane, chaga, reishi, and cordyceps, each of which brings its own distinct set of reported benefits ranging from enhanced cognitive function and nerve growth support to stress reduction and sustained physical energy.
Unlike what the name might suggest, mushroom coffee doesn’t taste like a cup of earthy forest floor but rather like a smoother, more rounded version of regular coffee with subtle umami undertones that blend seamlessly with the natural bitterness of the coffee itself, making it surprisingly accessible even for those who are initially skeptical.
The most common way to prepare mushroom coffee at home is by using a pre-blended mushroom coffee powder, which combines instant coffee or coffee extract with dual-extracted mushroom powder, but a more satisfying and customizable version can be made by brewing your preferred coffee normally and stirring in pure mushroom extract powder separately, giving you full control over the mushroom varieties and ratios you include based on your specific wellness goals for the morning.
The fat-soluble compounds in certain mushrooms are better absorbed in the presence of a small amount of healthy fat, which is why finishing the drink with a splash of full-fat coconut milk or oat milk isn’t merely a flavor choice but also a practical one that helps your body make better use of the beneficial compounds you’re adding.
- 1 cup freshly brewed hot coffee or 1 teaspoon instant coffee dissolved in 1 cup hot water
- 1 teaspoon lion’s mane mushroom extract powder
- ½ teaspoon chaga mushroom extract powder
- ½ teaspoon reishi mushroom extract powder
- ¼ cup full-fat coconut milk or oat milk, warmed
- 1 teaspoon raw honey or maple syrup, optional
- ¼ teaspoon ground cinnamon, optional
- Pinch of black pepper, optional
Brew your coffee using your preferred method and pour it into a large mug, then add the lion’s mane, chaga, and reishi mushroom powders directly to the hot coffee and whisk briskly with a small handheld frother or a regular whisk for thirty to forty-five seconds until the powders are fully dissolved and no clumps remain visible on the surface, then pour in the warmed coconut milk or oat milk, stir in the honey or maple syrup and cinnamon if using, and finish with a pinch of black pepper, which contains piperine and enhances the bioavailability of many plant compounds, giving the final drink one last stir before serving immediately while it’s still hot.
Mushroom extract powders vary markedly in quality depending on whether they’re made from the fruiting body of the mushroom or from the mycelium grown on grain, with fruiting body extracts generally considered more potent and beneficial, so reading labels carefully and looking for products that specify fruiting body and list the beta-glucan content will help you get the most out of this drink.
If you find the earthiness of the mushroom powders too pronounced when first starting out, beginning with smaller amounts such as half a teaspoon of each and gradually increasing over several mornings allows your palate to adjust naturally, and pairing the drink with a small amount of food rather than drinking it entirely on an empty stomach can help prevent the mild digestive sensitivity that some people experience when introducing medicinal mushrooms into their routine for the first time. For those who enjoy building a mindful and intentional morning routine, pairing this drink with a smart home display on your kitchen counter can help you track wellness goals, manage timers, and follow recipes hands-free while your mushroom coffee steeps.
Shop This Look

COFFEE, BUT REIMAGINED: Powered by 6 adaptogenic mushrooms, RYZE Mushroom Coffee supports you with all the energy and focus of regular coffee, with none of the jitters & crashes

BREWS SMOOTH, DARK, AND REMARKABLY CRASH-FREE — Each brew creates a delicious cup of full-bodied, flavorful coffee without the bitter aftertaste. But that's where the ordinary ends. That coffee beverage is infused with some of the world's most nutrient-dense ingredients, creating an astoundingly effective combination of immunity-increasing, attention-amplifying superfoods.

Coffee Got An Upgrade: Try our adaptogenic mushroom coffee blend, which contains premium fruiting body lions mane, chaga, collagen protein and l theanine for a smooth, creamy taste without jitters or crash.
Green Tea’s Calm, Focused Morning Boost

Green tea has been revered for centuries across East Asian cultures not only as a daily ritual but as a medicine, a meditation companion, and a source of gentle, lasting clarity that sets it apart from the more aggressive stimulation of coffee, and its morning magic lies in the unique pairing of a moderate amount of caffeine with an amino acid called L-theanine, which works synergistically to promote a state of alert relaxation that feels focused and calm rather than jittery or anxious, making it one of the most physiologically sophisticated morning beverages available to anyone seeking mental sharpness without the cortisol spike that often accompanies a strong espresso on an empty stomach.
The varieties of green tea available to the home brewer span an impressive range, from the grassy and vegetal notes of Japanese sencha to the sweeter, more rounded profile of gyokuro, the toasty warmth of hojicha, and the lighter, more delicate flavor of Chinese dragonwell, each offering a subtly different sensory experience while delivering the same core combination of antioxidants, catechins, and that signature calm focus that has made green tea a cornerstone of morning wellness routines around the world.
The key to a truly exceptional cup of green tea lies almost entirely in water temperature and steeping time, two variables that are frequently overlooked but that make an enormous difference in the final flavor, since green tea is far more sensitive to heat than black tea and will turn bitter and astringent almost immediately when steeped in boiling water, whereas water cooled to between 160 and 175 degrees Fahrenheit extracts the sweet, umami-rich compounds while leaving the harsh tannins behind, producing a cup that’s smooth, vibrant, and genuinely pleasant to drink even without any sweetener added.
Pairing the tea with a small drizzle of raw honey and a thin slice of fresh ginger amplifies the warming, digestive benefits of the morning drink while adding complexity without overshadowing the delicate character of the tea itself.
- 1 teaspoon high-quality loose-leaf green tea or 1 green tea bag
- 8 ounces filtered water, heated to 165 to 175 degrees Fahrenheit
- 1 thin slice fresh ginger, optional
- 1 teaspoon raw honey or a small wedge of lemon, optional
- 1 small strip of lemon zest, optional
Heat your filtered water to between 165 and 175 degrees Fahrenheit using a temperature-controlled kettle or by bringing water to a full boil and allowing it to rest for two to three minutes, then place your loose-leaf tea into a strainer or infuser set over your mug, add the fresh ginger slice directly to the mug if using, and pour the hot water gently over the tea, allowing it to steep for exactly two to three minutes without stirring or pressing the leaves, then remove the infuser immediately to prevent over-extraction, stir in the raw honey while the tea is still warm enough to dissolve it completely, and add the lemon zest or a small squeeze of fresh lemon juice if desired before drinking the tea slowly over the next several minutes while it remains at an ideal sipping temperature.
Green tea is highly sensitive to the quality of water used, so filtered or spring water will always produce a noticeably better cup than tap water, which can introduce minerals and chlorine that compete with the tea’s natural flavor compounds.
If you find that your green tea consistently tastes bitter even when you follow the correct temperature guidelines, try reducing your steeping time by thirty seconds, as the tannin release happens quickly and even a small adjustment can transform the entire character of the cup from astringent to smooth and mellow, and you should also be aware that drinking green tea on a completely empty stomach can cause mild nausea in some people due to its tannin content, so pairing it with a light snack like a few almonds or a small piece of fruit is a practical habit worth adopting from the very first morning you make it part of your routine. For those who enjoy building a complete sensory morning ritual, pairing your green tea practice with an ultrasonic diffuser releasing calming botanical scents like eucalyptus or lavender can deepen the meditative quality of the experience and help establish a consistent, grounding start to the day.
Matcha Latte for Sustained Morning Energy Without the Crash

Matcha is a finely ground powder made from shade-grown green tea leaves that have been carefully cultivated to maximize their chlorophyll, L-theanine, and antioxidant content, and because you’re consuming the entire leaf rather than just a brew steeped through it, the concentration of nutrients and active compounds in a single serving of matcha far surpasses what you’d find in even the strongest cup of brewed green tea, giving it a distinctive, almost electric quality of sustained focus that coffee drinkers often describe as surprisingly clean and smooth when they first experience it.
The morning matcha latte has become a beloved ritual precisely because it delivers that sustained energy without the sharp spike and inevitable crash that coffee produces, and when whisked properly into warm milk of any variety, it creates a vivid, jade-green drink that’s simultaneously earthy, grassy, slightly sweet, and deeply satisfying in a way that feels both nourishing and luxurious first thing in the morning.
The quality of matcha you choose matters enormously, and the difference between a ceremonial-grade powder and a low-quality culinary blend will be immediately apparent in the cup, since inferior matcha tends to taste harsh, overly bitter, or flat and muddy, while a good ceremonial-grade matcha from Japan offers a vibrant green color, a clean grassiness, and a natural sweetness that requires minimal additional sweetener to taste balanced and pleasant.
Oat milk has become the most popular non-dairy pairing for matcha lattes because its mild sweetness and creamy texture complement the grassy earthiness of the tea without competing with it, though whole dairy milk, almond milk, and coconut milk each bring their own appealing qualities to the final drink depending on your preference.
- 1 to 1½ teaspoons ceremonial-grade matcha powder
- 2 tablespoons hot water, heated to approximately 175 degrees Fahrenheit
- 8 ounces oat milk, whole milk, or preferred milk alternative
- 1 teaspoon raw honey, maple syrup, or sweetener of choice
- ¼ teaspoon vanilla extract, optional
- Pinch of cinnamon, optional
Sift the matcha powder into a small bowl or directly into your mug to remove any clumps, then add the two tablespoons of hot water heated to around 175 degrees Fahrenheit and whisk vigorously in a rapid zigzag or W-shaped motion using a traditional bamboo chasen whisk or a small electric milk frother until the matcha is completely dissolved, smooth, and slightly frothy with a thin layer of pale foam on the surface, which should take about thirty to forty-five seconds of consistent whisking.
Meanwhile, heat your milk of choice in a small saucepan over medium-low heat or using a steam wand until it reaches a temperature of around 150 degrees Fahrenheit and is steaming gently without boiling, then froth it using a handheld frother or by shaking it vigorously in a sealed jar, stir in your honey or maple syrup and vanilla extract directly into the warm milk, and finally pour the sweetened frothed milk slowly over the whisked matcha base, stirring gently once to combine and finishing with a pinch of cinnamon dusted across the top if desired.
Because matcha is markedly more potent than brewed green tea, beginners should start with just one teaspoon rather than the full one and a half to assess their sensitivity to the caffeine and L-theanine combination, and it’s worth noting that the temperature of your water is even more critical here than with brewed green tea because boiling water will scorch the delicate matcha powder almost instantly and produce a noticeably bitter, unpleasant flavor that no amount of sweetener can fully correct.
If you don’t have a temperature-controlled kettle, simply let your boiled water sit uncovered for three to four minutes before using it, and always sift your matcha before whisking because clumps that aren’t broken up before the water is added will never fully dissolve and will leave a gritty, uneven texture in the finished drink. Serving your finished matcha latte in smoked glass tumblers adds a sophisticated, aesthetically pleasing touch that enhances the visual appeal of the drink’s vivid jade-green color against the darkened glass.
Chai Tea for Warming Spice and Steady Morning Energy

Chai tea is one of the oldest and most deeply comforting morning beverages in the world, with roots in the Indian subcontinent stretching back thousands of years, and its combination of warming spices like cardamom, cinnamon, ginger, cloves, and black pepper creates a drink that not only tastes extraordinary but actively supports circulation, digestion, and mental clarity in ways that make it feel less like a beverage and more like a tonic for the entire body. The black tea base provides a steady, moderate caffeine lift that pairs with the thermogenic properties of the spices to produce a warm, expansive kind of alertness that feels grounding rather than jolting, which is why so many people who struggle with the anxiety that coffee sometimes produces find that a properly made chai latte becomes their preferred morning companion.
Making chai from scratch rather than relying on a pre-made concentrate or a powder packet makes an enormous difference in the final result, because fresh whole spices release aromatic oils and compounds that simply can’t survive the processing and shelf time that packaged products endure, and the brief extra effort of simmering whole spices in water before adding tea and milk rewards you with a depth, warmth, and complexity that will completely change your understanding of what chai is supposed to taste like. The spice ratios can be adjusted entirely to your personal preference, with more ginger for a spicier, more invigorating kick, more cardamom for a floral, perfumed quality, or more cinnamon for a sweeter and more familiar flavor profile.
- 1 cup water
- 1 cup whole milk, oat milk, or preferred milk alternative
- 2 teaspoons loose-leaf black tea or 2 black tea bags
- 4 green cardamom pods, lightly crushed
- 1 cinnamon stick
- 4 whole cloves
- 4 whole black peppercorns
- 1 inch fresh ginger, thinly sliced
- 1 star anise, optional
- 1 to 2 teaspoons honey, maple syrup, or sugar, to taste
Combine the water, crushed cardamom pods, cinnamon stick, cloves, black peppercorns, sliced ginger, and star anise if using in a small saucepan over medium heat and bring the mixture to a gentle boil, then reduce the heat and allow the spices to simmer for five to seven minutes until the water becomes fragrant and takes on a light golden color, at which point you add the tea bags or loose-leaf tea and continue simmering for an additional two to three minutes before pouring in the milk and raising the heat slightly, stirring occasionally, until the combined liquid just begins to froth and steam at the edges, then remove it from the heat immediately, add your sweetener of choice, and strain the chai through a fine mesh sieve directly into your mug.
When making chai, avoid boiling the milk aggressively once it has been added to the pan, since a rolling boil will cause the milk proteins to break down and create an unpleasant skin on top while dulling the aromatic freshness of the spices you worked to develop, and if you want a stronger, more intensely spiced chai, you can toast the whole spices briefly in the dry pan for thirty seconds before adding the water, which cracks them open slightly and releases a noticeably more robust and complex flavor into the final drink. The same warming spices that give chai its distinctive character, particularly cardamom and cinnamon, are also celebrated in luxury home fragrances for their ability to create an inviting, cozy atmosphere that transforms any living space.
Adaptogen Lattes That Help Your Body Handle Morning Stress

Adaptogen lattes have surged in popularity over the past several years as more people seek morning beverages that do something beyond simply providing caffeine, and the core idea behind them is rooted in the concept of adaptogens, which are a class of herbs, roots, and mushrooms that have been used in Ayurvedic and traditional Chinese medicine for centuries and are thought to help the body regulate its stress response, support adrenal function, and promote a more balanced and resilient form of energy throughout the day.
Common adaptogenic ingredients used in these lattes include ashwagandha, which is known for its calming and cortisol-balancing properties, reishi mushroom powder, which supports immune health and promotes a sense of calm focus, lion’s mane mushroom, which many people use for cognitive clarity and mental sharpness, and maca root, which contributes a subtle malt-like sweetness along with its energizing and hormone-supporting qualities.
The beauty of an adaptogen latte is that it’s deeply customizable, and you can build a blend that targets whatever your particular morning needs happen to be, whether that’s sharper focus, reduced anxiety, sustained physical energy, or simply a ritual that feels intentional and nourishing from the very first sip.
The base recipe below combines ashwagandha and lion’s mane as a foundational pairing that addresses both stress resilience and mental clarity, with a warming spiced milk base that makes the earthy, slightly bitter flavors of the adaptogens genuinely pleasant to drink rather than medicinal and difficult to get through.
- 1 cup oat milk, coconut milk, or preferred milk alternative
- 1 teaspoon ashwagandha powder
- 1 teaspoon lion’s mane mushroom powder
- ½ teaspoon maca root powder
- ½ teaspoon cinnamon
- ¼ teaspoon vanilla extract
- 1 teaspoon coconut oil or ghee
- 1 to 2 teaspoons honey, maple syrup, or sweetener of choice
- Pinch of sea salt
- Pinch of black pepper
Pour the milk into a small saucepan over medium-low heat and warm it gently until it’s steaming but not boiling, then whisk in the ashwagandha powder, lion’s mane powder, maca root powder, and cinnamon, stirring consistently to prevent any clumping, and once the mixture is smooth and fully combined, add the coconut oil or ghee along with the vanilla extract, a pinch of sea salt, and a small pinch of black pepper, which helps with bioavailability of certain compounds, then continue whisking for another minute before removing from heat and sweetening to taste, after which you can pour the latte directly into a mug or blend it briefly in a high-speed blender for a frothier, café-style texture that feels considerably more indulgent.
One important thing to keep in mind when working with adaptogen powders is that quality varies enormously between brands, and it’s worth seeking out products that specify the percentage of active compounds on the label, such as withanolides in ashwagandha, because cheaper powders are often heavily diluted with fillers that dramatically reduce their effectiveness and can even introduce unwanted ingredients into your morning routine.
Additionally, adaptogens are generally considered most effective when taken consistently over time rather than as a one-time addition, so if you incorporate this latte into your regular morning rotation you’re more likely to notice meaningful shifts in your stress response and energy levels after a few weeks of daily use rather than immediately after the first cup.
Golden Milk for an Anti-Inflammatory Morning Ritual

Golden milk, also known as haldi dua or turmeric milk, is a centuries-old Ayurvedic beverage that has found its way into modern wellness routines thanks to its impressive anti-inflammatory and antioxidant properties, and the star of the drink is turmeric, which contains curcumin, a bioactive compound that has been extensively studied for its ability to reduce systemic inflammation, support joint health, aid digestion, and even contribute to improved mood and cognitive function over time.
Starting your morning with golden milk rather than or alongside your usual beverage creates a ritual that feels warming, grounding, and deeply nourishing, and the combination of spices in the recipe works synergistically, with black pepper dramatically increasing the bioavailability of curcumin by up to 2000 percent thanks to a compound called piperine, while ginger adds its own anti-inflammatory punch and cinnamon helps stabilize blood sugar levels to prevent the kind of energy crashes that can undermine your morning.
The recipe below uses a full-fat coconut milk base, which lends a natural creaminess and richness that makes the drink feel genuinely indulgent while also providing healthy fats that further enhance the absorption of fat-soluble curcumin, and the addition of a small amount of coconut oil or ghee reinforces this effect.
The spice balance here is calibrated to produce a drink that tastes warmly spiced and slightly sweet without the raw, chalky turmeric flavor that can make poorly prepared versions unpleasant, and once you have made this recipe a few times you’ll find the process takes under ten minutes and becomes one of the most effortless and rewarding parts of your morning.
- 1 cup full-fat coconut milk
- ½ cup water
- 1½ teaspoons ground turmeric
- ½ teaspoon ground cinnamon
- ¼ teaspoon ground ginger or ½ teaspoon freshly grated ginger
- ⅛ teaspoon ground cardamom
- Pinch of black pepper
- 1 teaspoon coconut oil or ghee
- 1 to 2 teaspoons honey, maple syrup, or sweetener of choice
- ¼ teaspoon vanilla extract
Combine the coconut milk and water in a small saucepan over medium-low heat and warm the mixture until it begins to steam, then whisk in the turmeric, cinnamon, ginger, cardamom, and black pepper, stirring continuously to make certain the spices are fully dissolved and the mixture is completely smooth, and once the liquid is hot and fragrant, which should take about three to four minutes, remove the pan from heat and stir in the coconut oil or ghee, vanilla extract, and your sweetener of choice, whisking until the fat is fully emulsified into the drink, then pour into a mug and optionally use a milk frother to create a light foam on top before serving.
When making golden milk, one of the most common mistakes is using low-quality or old ground turmeric, as turmeric loses its potency and flavor over time, so sourcing a fresh, high-quality spice will make a noticeable difference in both taste and effectiveness, and if you want to streamline your mornings you can prepare a golden milk spice paste by combining the dry spices with a small amount of coconut oil and a splash of water, cooking the mixture briefly into a thick paste, and storing it in the refrigerator for up to two weeks so that all you need to do each morning is whisk a teaspoon of the paste into hot milk.
Additionally, those with sensitive stomachs should note that turmeric can occasionally cause mild digestive discomfort in high doses, so beginning with a smaller amount such as one teaspoon and gradually increasing it’s a sensible approach.
Kombucha as Your Gut-Friendly Morning Sip

Kombucha is a fermented tea beverage made through a symbiotic culture of bacteria and yeast, commonly referred to as a SCOBY, and while it’s most often purchased ready-made from health food stores and grocery shelves, brewing your own at home gives you complete control over the fermentation time, sweetness level, flavor profile, and the potency of the beneficial probiotics it contains.
Drinking kombucha in the morning on an empty or lightly filled stomach is considered by many wellness practitioners to be an ideal time for probiotic consumption, as the beneficial bacteria and organic acids in the drink can begin supporting your digestive system, reducing bloating, and promoting a balanced gut microbiome before the demands of the day begin, and regular morning consumption has also been associated with improved energy levels, better nutrient absorption, and even positive effects on mood due to the well-established gut-brain connection.
Making kombucha at home is a two-stage process that requires patience but very little active effort, with the first fermentation taking seven to fourteen days and producing a tangy, effervescent base, and an optional second fermentation of one to three days during which you add fruit juice, fresh fruit, or other flavoring agents to develop carbonation and complexity of flavor.
The recipe below yields approximately one gallon of first-fermentation kombucha, which gives you a generous supply to bottle and refrigerate for daily morning use, and the flavoring suggestions for the second fermentation are optional but highly recommended for anyone who finds plain kombucha too tart or unfamiliar at first.
- 1 gallon filtered water
- 8 bags black tea or green tea, or 2 tablespoons loose-leaf tea
- 1 cup plain white granulated sugar
- 2 cups unflavored store-bought raw kombucha as starter liquid
- 1 SCOBY
- Optional for second fermentation: ½ cup fruit juice such as ginger, mango, or blueberry per 16-ounce bottle
Bring one gallon of filtered water to a boil in a large pot, then add the tea bags and allow them to steep for ten to fifteen minutes before removing them, stir in the one cup of sugar until it’s completely dissolved, and allow the sweetened tea to cool to room temperature, which is critically important because adding the SCOBY to hot liquid will kill it, then transfer the cooled tea into a clean one-gallon glass jar, pour in the two cups of starter kombucha, and gently lower the SCOBY into the jar using clean hands, cover the jar with a tightly woven cloth or a few layers of cheesecloth secured with a rubber band to keep out contaminants while allowing airflow, and place the jar in a warm location away from direct sunlight where the temperature remains between 68 and 78 degrees Fahrenheit, and after seven days begin tasting the kombucha daily with a clean straw or spoon until it reaches a balance of sweetness and tartness that suits your palate, then remove the SCOBY and two cups of liquid to reserve as starter for your next batch, bottle the remaining kombucha in swing-top or screw-cap glass bottles, optionally adding fruit juice for a second fermentation at room temperature for one to three days before refrigerating to halt carbonation development.
When handling your SCOBY, always use clean hands or clean utensils and avoid any contact with soap residue or antibacterial products, as these will harm the living culture, and be aware that your SCOBY will grow a new layer with every batch, so you can peel them apart and share them with others or compost the older layers, and if you notice any fuzzy mold that’s green, black, or pink growing on the surface of your SCOBY or liquid, this indicates contamination and the entire batch including the SCOBY should be discarded and the process should be started fresh, though true contamination is relatively rare when proper cleanliness is maintained throughout the process.
Warm Bone Broth as a Savory, Protein-Rich Morning Drink

Warm bone broth has quietly become one of the most talked-about morning wellness drinks among nutritionists, athletes, and health-conscious individuals who want a savory, deeply nourishing alternative to sweet beverages, and its appeal lies in its remarkable nutritional density, which includes collagen, gelatin, amino acids like glycine and proline, minerals such as calcium, magnesium, and phosphorus, and a rich, satisfying flavor that can genuinely replace the need for breakfast in those practicing intermittent fasting or simply those who prefer to ease into their morning meals gradually.
Sipping a warm mug of bone broth first thing in the morning supports gut lining integrity, joint health, skin elasticity, and immune function, and unlike many morning drinks that spike blood sugar or rely on stimulants, bone broth provides a slow and steady sense of satiety and grounded energy that carries you through the first hours of the day without the crash that follows coffee or sugary drinks.
Making bone broth at home from scratch produces a far superior product compared to the boxed or carton versions found in most grocery stores, as the long, slow simmering process extracts maximum collagen and minerals from the bones while developing a deeply complex, savory flavor that store-bought versions rarely achieve.
While the recipe requires a long cooking time of twelve to twenty-four hours, the active preparation time is minimal, making it an excellent project to start in the evening and let simmer overnight so that a fresh batch is ready by morning.
- 3 to 4 pounds beef bones, chicken carcasses, or a combination of both, preferably with some marrow and joints included
- 2 tablespoons apple cider vinegar
- 2 medium carrots, roughly chopped
- 3 stalks celery, roughly chopped
- 1 large yellow onion, quartered with skin on
- 6 cloves garlic, smashed
- 2 bay leaves
- 1 teaspoon whole black peppercorns
- 1 teaspoon sea salt, plus more to taste
- Small handful fresh parsley or thyme stems, optional
- Filtered water, enough to fully submerge all ingredients, approximately 12 to 14 cups
Preheat your oven to 400 degrees Fahrenheit and arrange the bones on a rimmed baking sheet, roasting them for thirty to forty minutes until they’re deeply browned on the outside, as this step develops the rich color and umami depth that defines a well-made broth, then transfer the roasted bones into a large stockpot or slow cooker along with the apple cider vinegar, carrots, celery, onion, garlic, bay leaves, peppercorns, salt, and any herbs you’re using, cover everything with filtered water, and if using a stockpot bring the liquid to a full boil over high heat before immediately reducing to a very gentle simmer, skimming any gray foam that rises to the surface during the first thirty minutes, then allow the broth to simmer uncovered or partially covered for a minimum of twelve hours and up to twenty-four hours, adding small amounts of water if the level drops too much.
After which you strain the finished broth through a fine mesh strainer lined with cheesecloth into a large bowl or container, discard all solids, taste and adjust salt as needed, and allow the broth to cool before transferring to glass jars or containers for refrigeration.
When preparing bone broth for regular morning consumption, it helps to make large batches every week or two and store the finished broth in individual single-serving jars so that each morning you only need to remove one jar from the refrigerator and gently reheat it on the stovetop or in the microwave rather than preparing it fresh each day, and you should also be aware that a properly made bone broth will gel when chilled due to the high gelatin content extracted from the joints and connective tissue, which is actually a sign of exceptional quality rather than a defect.
If you want to enhance your morning mug even further you can stir in a small knob of grass-fed butter, a pinch of turmeric and black pepper, or a few drops of hot sauce to suit your personal taste.
Beetroot Juice for Natural Morning Stamina and Circulation

Beetroot juice has earned a well-deserved reputation as one of the most effective natural performance beverages available, and its growing presence in the routines of endurance athletes, busy professionals, and health enthusiasts is backed by a substantial and compelling body of research showing that the naturally occurring nitrates found in beets convert to nitric oxide in the body, which dilates blood vessels, improves oxygen delivery to muscles and organs, lowers resting blood pressure, and creates a measurable improvement in cardiovascular efficiency that can be felt within hours of consumption and builds cumulatively when consumed regularly each morning.
Unlike stimulant-based energy drinks or caffeine-heavy beverages, beetroot juice produces a clean and sustained physical and mental energy that works with the body’s own biochemical systems rather than overriding them, making it an ideal morning drink for anyone who wants to feel sharp, physically capable, and cardiovascularly supported from the earliest hours of the day.
Preparing fresh beetroot juice at home is straightforward and takes only minutes when you have a juicer or high-speed blender available, and while the earthy, slightly sweet flavor of beets is the dominant note, it pairs beautifully with apple for sweetness, ginger for warmth and anti-inflammatory benefit, lemon for brightness and vitamin C, and carrots for additional natural sugar and beta-carotene, creating a morning juice that isn’t only nutritionally exceptional but genuinely pleasurable to drink before you have eaten anything else, which is the ideal time to consume it so that nitrate absorption isn’t impeded by food in the digestive system.
- 2 medium raw beets, scrubbed and peeled, cut into chunks
- 1 medium apple, cored and quartered
- 1 medium carrot, roughly chopped
- 1-inch piece fresh ginger, peeled
- Half a lemon, juiced
- Pinch of sea salt
- Half a cup filtered water, only if blending rather than juicing
Feed the beets, apple, carrot, and ginger through your juicer one piece at a time, collecting the juice in a wide-mouthed jar or glass pitcher, then stir in the freshly squeezed lemon juice and a pinch of sea salt, which draws out additional flavor complexity and balances the natural earthiness of the beet, and if you’re using a high-speed blender instead of a juicer, combine all ingredients with the half cup of filtered water and blend on high for sixty to ninety seconds until completely smooth, then pour the blended mixture through a fine mesh strainer or nut milk bag, pressing firmly with the back of a spoon or squeezing with your hands to extract as much liquid as possible, discarding the pulp or saving it for use in baked goods like muffins or veggie burgers, and serve your finished juice immediately over ice or at room temperature depending on your preference.
Wear an apron and use a cutting board you don’t mind staining deeply, because raw beet juice is intensely pigmented and will mark fabric, countertops, and light-colored surfaces on contact, and if you notice your urine or stool appearing pink or red the following day after drinking beetroot juice, don’t be alarmed as this harmless phenomenon is called beeturia and affects a significant portion of the population without any health implications, while those taking blood pressure medications should consult their physician before making beetroot juice a daily habit since the compounding blood pressure-lowering effect of both the nitrates in beets and the medication could potentially lower pressure more than intended, and finally, always drink your juice within twenty minutes of preparation to preserve the maximum nitrate content, as oxidation begins immediately once the beet is cut and juiced.
Celery Juice: What It Actually Does and Doesn’t Do

Celery juice has become one of the most discussed and debated wellness beverages of the past decade, catapulted into mainstream consciousness by social media claims that range from the scientifically supported to the dramatically overstated, and understanding what celery juice actually delivers versus what’s been mythologized around it’s essential before incorporating it into your morning routine with realistic expectations.
What the research does support is that celery contains beneficial compounds including vitamin K, potassium, folate, and antioxidants such as apigenin and luteolin, and that fresh celery juice on an empty stomach provides a genuinely hydrating, mildly alkalizing, and anti-inflammatory start to the day that many people find improves their digestion and reduces bloating over consistent daily use.
What celery juice doesn’t do, despite widespread claims, is cure chronic illness, detoxify the liver in any dramatic medical sense, or function as a standalone healing protocol for complex health conditions, and approaching it as a simple, clean, mineral-rich morning hydration drink rather than a miracle cure allows you to appreciate its genuine and modest benefits without disappointment.
Made from nothing but fresh celery and optionally a small squeeze of lemon to brighten the flavor, it’s one of the simplest juices you can prepare, requiring only a juicer or blender and a few stalks of celery, and its pale green color, mild savory-green taste, and satisfying crispness make it a genuinely pleasant morning ritual when consumed sixteen ounces at a time on an empty stomach before coffee or food.
- 1 large bunch fresh celery, approximately 9 to 10 stalks
- Half a lemon, juiced, optional
- Quarter cup filtered water, only if blending rather than juicing
Wash your celery stalks thoroughly under cold running water, trim the base and any discolored tips, then feed each stalk through your juicer one at a time until all the juice has been extracted, after which you should stir in the optional lemon juice if you’re using it and drink immediately while the enzymes and volatile compounds are at their most active.
Or, if you’re using a high-speed blender rather than a juicer, combine the roughly chopped celery stalks with the quarter cup of filtered water and blend on high for sixty seconds, then pour the blended mixture through a fine mesh strainer or nut milk bag, pressing firmly to extract as much liquid as possible before adding the lemon and serving at once.
For the best results, drink your celery juice first thing in the morning before consuming any other food or beverage, including water, and wait at least fifteen to twenty minutes before eating breakfast so that the digestive system can fully absorb the nutrients without interference from other foods.
Always use organic celery when possible because conventionally grown celery is among the produce items most likely to carry pesticide residue, which becomes more concentrated when the entire stalk is juiced and consumed in liquid form without the fiber buffer of whole food.
Herbal Teas That Support Morning Focus Without Caffeine

Herbal teas have long served as the preferred morning companion for those who find caffeine too stimulating, too anxiety-inducing, or simply incompatible with their health goals, and the remarkable variety of botanical options available means that forgoing caffeine in the morning doesn’t require forgoing mental clarity, alertness, or the warm, grounding ritual that a morning beverage provides. Herbs such as peppermint, rosemary, ginkgo biloba, gotu kola, and lion’s mane mushroom have each accumulated meaningful research suggesting they support cognitive performance, circulation to the brain, and sustained mental alertness through mechanisms entirely distinct from caffeine’s adenosine-blocking pathway, meaning the focus they provide tends to feel cleaner and more even rather than accompanied by the familiar spike and crash cycle.
The blend described here combines peppermint for its cooling, invigorating qualities and demonstrated effect on alertness and memory recall, dried rosemary for its circulation-enhancing rosmarinic acid content, and gotu kola for its traditional use as a mental tonic, creating a morning tea that tastes herbaceous, bright, and pleasantly complex while genuinely supporting the kind of steady focus that makes the first hours of the day productive rather than foggy. Brewed correctly and consumed warm over fifteen to twenty minutes rather than rushed, this tea becomes as ritualistic and grounding as any coffee habit while leaving the nervous system calm and the mind genuinely engaged.
- 1 teaspoon dried peppermint leaves
- 1 teaspoon dried rosemary leaves
- 1 teaspoon dried gotu kola leaf
- 1 teaspoon raw honey, optional
- 2 cups filtered water
- 1 slice fresh lemon, optional
Bring your filtered water to approximately ninety to ninety-five degrees Celsius rather than a full rolling boil, as boiling water can degrade the more delicate volatile compounds in peppermint that contribute to its cognitive and aromatic effects, then combine the dried peppermint, rosemary, and gotu kola in a tea infuser, strainer, or directly in a small teapot, pour the hot water over the herbs, and allow the blend to steep for seven to ten minutes, covered with a small plate or lid to trap the aromatic steam that would otherwise carry away much of the peppermint’s beneficial volatile oils, after which you should strain the tea into your mug, stir in the optional honey if using, add the lemon slice if desired, and drink while still comfortably warm.
When sourcing your herbs, prioritize organic dried herbs from reputable suppliers rather than low-quality commercial tea bags, as the potency and freshness of the botanicals directly determines how effectively the tea supports focus and alertness, and if you find the rosemary flavor too assertive on your first brew, reduce it to half a teaspoon while keeping the other herbs at full measure until your palate adjusts, noting also that gotu kola can be intensified over time as your body acclimates, and that this blend can be prepared the night before by cold-brewing the herbs overnight in the refrigerator for eight hours, then gently rewarmed in the morning to preserve an even higher concentration of heat-sensitive beneficial compounds.
Protein Shakes That Fuel Your Morning Workout

Protein shakes designed for morning workouts occupy a category of performance nutrition that goes well beyond simply blending a scoop of powder with water, because the most effective pre or post workout morning shakes are intentionally constructed to deliver fast-absorbing protein alongside complementary carbohydrates, healthy fats, and micronutrients that support muscle protein synthesis, sustained energy output, and recovery simultaneously.
The timing of a morning workout shake relative to exercise matters considerably, with a pre-workout version ideally consumed thirty to forty-five minutes before training to allow partial digestion and a steady fuel supply, while a post-workout version should emphasize rapid absorption and a higher carbohydrate to protein ratio to replenish glycogen stores and halt the muscle breakdown that intense training initiates.
The recipe below is built around whey protein isolate as the primary protein source due to its exceptional amino acid profile and rapid digestibility, supported by banana for natural sugars and potassium that combat muscle cramping, oats for slow-releasing complex carbohydrates, almond butter for caloric density and healthy monounsaturated fats, and a base of milk or a milk alternative to bring the macronutrient profile into an ideal range for morning training sessions.
The resulting shake is thick, genuinely filling, and nutritionally complete enough to function as both fuel and recovery support without requiring additional food before or immediately after a moderate to intense training session.
- 1 scoop whey protein isolate, approximately 25 to 30 grams
- 1 medium ripe banana, fresh or frozen
- ¼ cup rolled oats, dry
- 1 tablespoon natural almond butter
- 1 cup whole milk or unsweetened oat milk
- ½ cup ice cubes
- 1 teaspoon honey, optional
- ½ teaspoon ground cinnamon
- Pinch of sea salt
Add the rolled oats to your blender first and pulse them alone for ten to fifteen seconds to break them into a finer powder that will integrate smoothly rather than leaving a grainy texture, then add the banana, almond butter, protein powder, cinnamon, sea salt, and optional honey before pouring in your milk of choice and adding the ice, then blend the entire mixture on high speed for forty-five to sixty seconds until completely smooth and creamy, checking the consistency and adding an additional splash of milk if the shake is too thick to drink comfortably through a wide straw, then pour immediately into a chilled glass and consume within ten minutes to prevent the oats from absorbing liquid and thickening the texture further.
When preparing this shake regularly, consider freezing your bananas in advance once they’ve reached peak ripeness, as frozen banana eliminates the need for as much ice while contributing a creamier texture and more intense natural sweetness that reduces the need for added honey, and if you’re consuming this shake post-workout and find your appetite suppressed immediately after intense training, blending it slightly thinner with extra milk makes it easier to consume quickly when solid food feels unappealing but nutritional replenishment remains urgent for recovery.
Morning Smoothies That Work as a Full Breakfast

Morning smoothies designed to function as a complete breakfast rather than a light snack require a fundamentally different construction philosophy than a typical fruit blend, because they must deliver sufficient protein to support satiety and muscle maintenance, adequate healthy fats to slow digestion and stabilize blood sugar, and enough fiber and complex carbohydrates to sustain energy levels well past the mid-morning slump that a sugar-dominant smoothie inevitably produces.
When these macronutrient pillars are properly balanced, a breakfast smoothie can genuinely replace a cooked meal without leaving you hungry within an hour, which is the most common failure point of smoothies that rely too heavily on fruit alone.
The recipe below builds its nutritional foundation on Greek yogurt as the primary protein and probiotic source, combined with frozen mixed berries for antioxidants and natural sweetness, spinach for iron and vitamins without detectable flavor interference, avocado for creamy texture and heart-healthy monounsaturated fats, chia seeds for omega-3 fatty acids and soluble fiber, and a base of unsweetened almond milk that keeps the calorie density appropriate while contributing additional calcium and vitamin E.
The combination produces a thick, vibrant, genuinely satisfying smoothie that delivers approximately four hundred to four hundred fifty calories with a well-distributed macronutrient profile that supports sustained mental and physical performance through the morning hours.
- 1 cup plain full-fat Greek yogurt
- 1 cup frozen mixed berries
- 1 cup fresh baby spinach, loosely packed
- ½ medium ripe avocado
- 1 tablespoon chia seeds
- 1 tablespoon natural almond butter
- 1 cup unsweetened almond milk
- 1 teaspoon raw honey
- ½ teaspoon vanilla extract
- ¼ teaspoon ground cinnamon
- Pinch of sea salt
Add the almond milk to the blender first to protect the blades and encourage smooth blending, then layer in the spinach and blend it with the liquid alone for fifteen seconds until no visible leaf pieces remain, before adding the frozen berries, Greek yogurt, avocado, almond butter, chia seeds, honey, vanilla extract, cinnamon, and sea salt, then blend the full mixture on high speed for sixty to ninety seconds until completely smooth and uniformly colored, stopping once to scrape down the sides if the avocado or yogurt clings to the walls, and pour immediately into a large glass or wide-mouth jar, adding a splash of additional almond milk to thin the consistency if it becomes too thick to drink easily.
Because chia seeds continue absorbing liquid after blending, this smoothie thickens noticeably within ten to fifteen minutes of preparation, so drinking it promptly after blending gives you the best texture, though intentionally letting it sit covered in the refrigerator for thirty minutes transforms it into a spoonable smoothie bowl consistency that you can top with granola, fresh fruit slices, or a drizzle of additional honey for added texture contrast.
If you find the spinach flavor detectable despite blending, increasing the frozen berries by a quarter cup will mask it completely without meaningfully altering the macronutrient balance, and substituting full-fat coconut milk for the almond milk adds richer flavor and additional medium-chain triglycerides that support cognitive function during demanding morning work.
Frequently Asked Questions
Can Morning Beverages Replace a Full, Nutritious Breakfast Entirely?
No, they can’t — and here’s why that matters for you. While beverages hydrate and energize, they lack the fiber, protein, and essential nutrients your body craves from whole foods each morning.
Are Morning Drinks Safe for Children and Teenagers to Consume?
Some morning drinks are safe for kids and teens, but you’ll want to avoid caffeinated or sugary options. I’d recommend sticking to milk, water, or natural fruit juices to support their growing bodies healthily.
How Do Morning Beverages Interact With Common Prescription Medications?
Ever wonder why your coffee makes your heart race on certain meds? Morning beverages can interfere with prescriptions—caffeine affects blood thinners, grapefruit juice blocks enzymes, and milk reduces antibiotic absorption markedly.
Can Drinking Too Many Morning Beverages Cause Dehydration Over Time?
Yes, drinking too many caffeinated morning beverages can dehydrate you over time. Coffee and tea act as mild diuretics, so I’d recommend balancing them with plenty of water throughout your day to stay properly hydrated.
Which Morning Beverages Are Completely Safe During Pregnancy?
I’d recommend water, pasteurized fruit juices, and herbal teas like ginger or peppermint as safe morning options during pregnancy. You’ll want to avoid high-caffeine drinks and always consult your doctor for personalized guidance.


