


You’ve likely noticed how traditional ceilings fragment your sightlines with bulky beams and dated step-downs. The 2026 shift toward invisible shadowlines and floating planes transforms overhead space into a seamless fifth wall—one that manipulates light, proportion, and flow without shouting for attention. Whether you’re working with a 2.7-meter slab or retrofitting a rental, understanding reveal dimensions, LED color temperatures, and substrate tolerances separates amateur attempts from architecturally coherent results that age gracefully.
The “Invisible” Drop: Shadowlines & Floating Edges

You’ll achieve the cleanest minimalist look by eliminating visible trim through a shadowline—a narrow perimeter recess that separates your dropped soffit from the main ceiling, creating the illusion that the surface floats.
This technique relies on precise dimensional control: a 15–30 mm gap set 20–40 mm deep, maintained within ±2 mm tolerance around the room to preserve visual continuity.
The recess doubles as a concealed channel for linear LED strips or recessed magnetic track systems, delivering indirect backlighting that reinforces the floating effect while solving your ambient and accent lighting needs.
What Are Shadowline Ceilings
When a minimalist living room ceiling appears to detach from its walls, the technique behind that optical trick is the shadowline—a precisely engineered perimeter recess that runs continuously along the ceiling-wall junction.
The shadowline ceiling profile creates a 10–30 mm deep gap that casts a uniform shadow, making the ceiling plane appear to float.
This shadowline ceiling relies on millimeter-perfect gypsum work and straight-edge trims to maintain consistency across all four walls.
You’ll typically see widths between 15–40 mm, scaled to your room’s proportions.
The recess does double duty: it conceals wiring runs, construction tolerances, and joints while delivering that sought-after “invisible” edge.
Finish it in matte white to preserve the clean shadow, and consider embedding LED strips inside to amplify the floating effect without exposing any fixtures.
🛠️ Shadowline Ceiling Starter Kit
Want that clean floating edge without paying contractor premiums? Here are the exact tools and materials for a professional 10mm reveal.
- 1. The Precision Tool: Green Self-Leveling Laser Level Essential for dead-straight shadow gaps. Green beam is visible even in bright rooms.
- 2. The Glow: COB LED Strip (60 LEDs/m, 3000K Warm White) Dotless LED creates continuous light. No visible spots or gaps.
- 3. The Diffuser: Muzata Aluminum U-Channel with Diffuser Spotless diffuser hides individual LEDs. Bare aluminum reflects 36% more light.
*Affiliate links. All products available with Prime shipping.
Creating The Floating Effect
Because the brain interprets continuous shadow as depth rather than line, a well-executed shadowline transforms a simple dropped perimeter into a ceiling that reads as suspended in space.
You’ll achieve this by recessing a 20–40 mm gap between your POP design for hall perimeter and the main ceiling plane. Conceal warm-white LED strips (2700–3000K) within this gap so cove lighting bounces upward, creating an even halo without visible fixtures.
Keep your total drop minimal—25–75 mm—with crisp 2–4 mm chamfers on exposed edges to maintain sharp shadowlines. Align gaps with major architectural axes and maintain uniform widths; inconsistent spacing destroys the floating illusion.
Finish with matte, light-neutral ceiling paint (LRV 60–85) to control reflections and preserve perceived separation.
Recessed Track Lighting Options
Recessed magnetic track channels drop into the shadowline gap itself, so adjustable spotlights click in and out without cutting into your main ceiling plane. This system solves two problems: you preserve the minimalist look while gaining flexible accent lighting for art, shelves, or zones.
Recessed magnetic track lights deliver the cleanest low ceiling solutions:
- Narrow housing depth: 40–75 mm clearance above plasterboard conceals drivers and wiring, preventing hot spots at the edge.
- Beam control: 10–20° spreads with diffusers eliminate scalloping and produce even wall washes that reinforce the floating effect.
- Dimming uniformity: Specify 400–800 lm/m output and compatible drivers to maintain consistent color (2700–4000 K, 80+ CRI) across all brightness levels.
Choose continuous tracks with low-profile modules to keep sightlines uninterrupted and adaptable.
Best Materials For Shadowlines
Precision at the junction determines whether your shadowline reads as a deliberate floating plane or a sloppy gap.
Use moisture-stable gypsum board ceiling material (12–15 mm thickness) for your false ceiling design perimeter drop, reinforced with metal L-channels at the reveal edge.
Apply polyurethane sealant at junctions to prevent sag and maintain crispness over time.
The reveal itself—typically 3 mm wide—should be cut with ±1 mm tolerance; anything looser breaks the floating effect.
Install back-blocking at inside corners to eliminate light bleed and edge distortion.
Finish reveal edges with matte or satin paint, keeping an LRV difference of 5–10 points from the main ceiling.
This contrast prevents specular highlights that destroy the illusion of separation, ensuring your shadowline remains architecturally intentional.
Installation Tips And Tricks
- Set LED strip channels 15–30 mm back from the edge so light washes the ceiling without hotspots
- Use UD and CD metal profiles to anchor floating edges; avoid hanging heavy fixtures from the perimeter zone
- Maintain 10–25 mm gap width consistently around the room for a clean, readable shadowline at 3–6 m viewing distance
Route all wiring and fan mounts through the primary ceiling plane to preserve the floating effect.
Cost Considerations And Budgeting
Although the clean geometry of shadowlines and floating edges delivers a sophisticated, boundary-free aesthetic, this detail typically adds 3–8% to your overall false ceiling budget.
The invisible drop requires an extra 10–20 mm perimeter recess, increasing material waste and demanding 1–2 additional labor hours per linear meter for precision joints.
Indirect lighting concealed within these modern ceiling ideas raises electrical costs by 5–12% due to LED strips, diffusers, and routed channels.
For a 200–400 sq ft living room, expect $250–$750 in incremental expenses.
Mitigate costs by limiting shadowlines to accent zones, using standard LED profiles instead of custom channels, and phasing painting or lighting work separately to distribute expenditures across project milestones.
Maintenance And Cleaning Guide
Because shadowlines and floating edges introduce recessed 1–3 cm reveals between ceiling planes and perimeter walls, they create horizontal ledges that trap airborne particulate faster than continuous flush surfaces. Vacuum these reveals every 4–6 weeks with a soft brush attachment to prevent visible dust accumulation and fine cobwebs.
Routine cleaning protocol:
- Shadowline gaps: Use microfiber cloths or electrostatic dusters to reach narrow reveals; never apply water-based cleaners directly on exposed POP edges to avoid material swelling.
- LED channel reveals: Inspect recessed cove lighting twice annually; wipe with dry cloth or low-suction vacuum to maintain uniform indirect illumination and prevent thermal hot spots.
- Structural integrity: Schedule professional inspections every 3–5 years to verify concealed fasteners, anchors, and hidden wiring behind floating borders remain corrosion-free and structurally sound.
High-Tech Lighting Integrations (Magnetic & Smart)

Modern minimalist ceilings demand lighting systems that disappear architecturally while delivering maximum flexibility.
Magnetic track solutions embed low-profile channels (15–30 mm reveal) directly into your POP substrate, allowing you to click spotlights into position without tools or permanent wiring commits.
Pairing these reconfigurable rails with smart RGBW modules gives you voice-activated dimming, tunable white temperatures (2,700–6,500 K), and app-programmed scenes that adapt your ambient lighting to time of day or activity.
Shop This Look

Manual Control Design – No Motion Sensor: This RGB under cabinet light is designed for remote and button control only. It does not include a motion sensing feature. Simply turn it on/off and adjust colors and brightness using the remote or manual switch for precise lighting control without unexpected activation

2400mAh Rechargeable Battery: Say goodbye to battery swaps! Built-in 2400mAh battery offers 9 hours(highest brightness) of use. EZVALO 7.87'' wireless LED picture light charges in just 3.5 hours via USB-C. Use your power bank, phone charger, or laptop – always ready to light up your favorite art.

Upgraded Motion Sensor Lights: Automatically turns on when motion is detected within a 120° and 10 ft range in dark or low-light areas. The lights stay on while motion is detected and automatically turn off after about 20 seconds of no movement to help save battery life. Ideal for closets, cabinets, hallways, stairs, and other dimly lit spaces. Please note: motion sensing only works in dark environments.
Magnetic Track Lighting Systems
Magnetic track lighting systems break away from traditional fixed-ceiling fixtures by embedding low-voltage 24V DC rails directly into recessed channels, creating what designers call an “invisible infrastructure” for your entire lighting layout.
You’ll click spotlights, linear modules, or pendants into place without tools—power flows through magnetic contacts the moment each fixture locks onto the conductive rail.
Key advantages for minimalist living rooms:
- Tool-free reconfiguration: Reposition fixtures in seconds to highlight artwork, define zones, or adapt to new furniture layouts
- Smart integration: DMX, Zigbee, or Thread protocols enable per-fixture dimming and 2700–6500K tuning via app control
- Reduced renovation labor: Modular systems cut installation time by up to 50% compared to traditional recessed downlights
Verify your track’s total wattage capacity—most residential modules draw 5–20W each.
Voice-Activated Smart Controls
Tapping into voice-activated smart controls turns your minimalist ceiling into a responsive lighting ecosystem—say “evening mode” and watch ambient cove strips dim to 2,700K while magnetic accent spots ramp up over architectural slats, all without reaching for a switch.
Behind the scenes, low-voltage bus wiring (12–24V DC) and centralized controllers communicate via local Wi‑Fi or Zigbee, preserving your clean finishes while enabling color temperature shifts up to 6,500K and 1% dimming for circadian schedules.
Plan modular mounting zones at 300–600 mm spacing and include access panels so you can swap magnetic modules without disturbing POP layers.
Prioritize local-edge processing and encrypted device communication to keep unauthorized users out, maintaining both security and the seamless aesthetic you’ve designed.
RGB Color Changing Options
Beyond pre-programmed scenes, RGB color-changing strips release real-time palette control across your minimalist ceiling architecture. Magnetic RGBW modules snap into recessed channels or peripheral coves, delivering approximately 16 million colors plus tunable white (2700–6500K) for precise mood shifts. You’ll maintain design integrity while adapting ambiance on demand.
Key implementation points:
- CRI ≥90 fixtures preserve material authenticity—light oak slats and concrete textures render accurately under high-fidelity RGBW, whereas RGB-only skews color perception
- Wi‑Fi or Zigbee controllers enable voice commands and circadian routines that auto-adjust saturation and warmth throughout the day, latency under 100 ms
- Low-voltage magnetic rails consume 4–12 W/m and allow tool-free module swaps without ceiling access, critical in apartments where soundproofing layers complicate maintenance
Music-sync and gradient effects add dynamic layering to shadowline profiles and island drops.
Wireless Remote Dimming Features
Frequently, installers bypass dedicated dimmer switches altogether by embedding 2.4 GHz RF or Zigbee receivers directly into magnetic track channels or peripheral LED drivers. You’ll gain control range up to 30–50 meters indoors without line-of-sight constraints, letting wall-mounted or handheld remotes adjust brightness zone by zone.
Look for PWM drivers running above 1.2 kHz or analog 0–10V modules to eliminate flicker and preserve smooth 0–100% curves. Smart systems integrate Wi‑Fi or mesh protocols for circadian tuning between 2700–6500K and scene scheduling.
Battery-powered magnetic remotes retrofit seamlessly into shadowline profiles, maintaining the minimalist aesthetic while grouping multiple tracks. Each 12–48V magnetic segment supports up to 60W, enabling tool-free repositioning and precise spatial layering across your living room.
App-Based Scene Programming
Dedicated lighting apps let you build all-encompassing scene libraries that assign distinct brightness, color temperature (2700–6500K), and RGB values to every magnetic track, cove strip, and accent module in your living room. Each scene—Relax, Focus, Movie—adjusts multiple zones simultaneously, ensuring spatial harmony. Plug-and-play magnetic modules auto-map into the app within seconds, streamlining fixture additions without rewiring.
- Circadian schedules shift warm (2700–3000K) tones for evening downtime to cool (4000–5000K) daylight modes, supporting natural sleep-wake cycles.
- Conditional automations trigger corridor cove lighting at 20% warm white when motion is detected after sunset, blending security with ambiance.
- Energy dashboards track per-zone kWh and runtime, enabling optimizations that cut lighting consumption by up to 40% versus static full-power operation.
Motion Sensor Integration Benefits
By embedding motion detectors into recessed magnetic channels or shadowline coves, you achieve hands-free activation that slashes lighting energy consumption by 30–50% while extending LED lifespan through reduced runtime.
High-quality PIR or microwave sensors respond in under 0.5 seconds with false-trigger rates below 3% when ceiling-mounted 2–3 meters from traffic paths. You’ll enable instant scene-switching—ambient, task, or accent—based on detected movement within a 0.5–5 meter range.
Smart systems dynamically adjust color temperature from 2700K evening warmth to 5000K daytime clarity, supporting circadian rhythm.
Because magnetic low-voltage modules reposition without rewiring, you retain full sensor control across reconfigurations. This integration transforms minimalist ceilings into responsive environments that balance automation, energy efficiency, and spatial adaptability.
Energy Monitoring Smart Fixtures
Motion-activated convenience pairs naturally with intelligent measurement. Magnetic low-voltage LED fixtures equipped with integrated current sensors deliver real-time power draw per fixture, accurate to ±2–5%, enabling room-level energy auditing directly from your false ceiling installation. Smart controllers using Zigbee, BLE Mesh, or Thread protocols sample fixture data every 1–60 seconds, pushing aggregated kWh usage to home energy dashboards for trend analysis.
Key monitoring capabilities:
- Per-fixture metering: Modular magnetic track heads contain addressable drivers that report individual consumption, runtime, and lux metrics
- Automated optimization: Onboard occupancy and ambient-light sensors reduce lighting energy by 40–70% through adaptive dimming
- Demand-response throttling: Controllers dim nonessential loads to 20–50% during peak-price events, cutting demand charges up to 30%
This integration transforms your minimalist ceiling into an intelligent energy asset.
💡 Upgrade: The 2026 Magnetic Track System
Opening the ceiling for a remodel? Swap old fixed downlights for this modular system. Click lights in and out anytime—no tools needed.
Why 2026 Designers Love It: One track replaces 4-6 fixed downlights. Tool-free repositioning. Works with smart dimmers for app control.
*48V system requires licensed electrician for installation.
Material Mix: Wood Slats & Textured Gypsum

You’ll achieve lasting minimalist warmth by combining narrow wood slats (20–50 mm wide) with textured gypsum panels in a controlled 30–40% wood to 60–70% gypsum ratio.
This layered approach lets you establish clear visual zones—horizontal slat runs define direction and rhythm, while textured gypsum fields (sand or fine knockdown finishes) anchor quieter ceiling areas and absorb ambient sound.
Strategic placement of each material over recessed bays and furring strips creates concealed channels for linear LEDs, delivering seamless indirect light without exposed hardware.
Shop This Look

High-Quality Wall Panels: Our acoustic panel set is crafted with high-density polyester fiber, premium medium-density fiberboard, and a solid wood veneer. This combination provides an elegant look, superior sound damping, and excellent sound deadening, significantly improving room acoustics
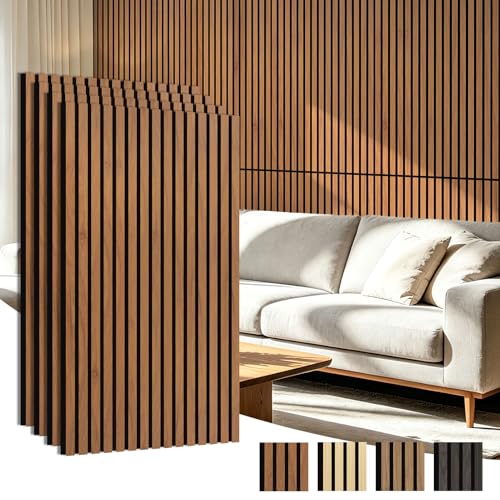
【Clatter vs. Atter】Say goodbye to ringing rooms. This 4-pack of 47×23.6 inch (a total of 30.8 Sq.ft) panel turns noisy space into crisp area, ideals for new home buyers, future movers, podcasters or remote workers.

Superior Acoustic Performance: It is designed to provide excellent noise-cancellation capabilities, making it ideal for use in homes, offices, studios, and other spaces where acoustic quality is a priority
Combining Natural and Modern
When you pair linear wooden slats with textured gypsum panels, you create a tactile contrast that anchors the eye without overwhelming the ceiling plane. This marriage of natural warmth and modern simplicity reduces the perceived loss of ceiling height while maintaining a clean profile.
To execute this effectively:
- Choose 20–40 mm wide slats with 10–15 mm gaps to maintain rhythm without visual congestion
- Balance warm wood tones (LRV 20–30) against neutral gypsum (LRV 70–85) to preserve brightness and spatial clarity
- Integrate slim recessed LED strips (4–8 W/m, 2700–3000K) within slat gaps and gypsum joints to highlight material edges
Seal wooden elements with matte water-based varnish and finish gypsum with a micro-textured skim coat that conceals joints while preserving intended contrast.
Wood Slat Placement Patterns
Wood slat placement governs visual flow and spatial perception more than finish or color. Orient slats parallel to your room’s longest axis—typically 90–180° to window walls—to visually elongate the space and enhance depth.
Use slat widths of 30–80 mm with 12–18 mm thickness, spacing them at 20–40 mm gaps over textured gypsum to achieve NRC improvement of 0.2–0.4 for acoustic absorption. Alternate grain directions in runs to create subtle rhythm without visual weight.
Integrate 15–30 mm recessed channels between slat banks to conceal warm white LED strips (2700–3000 K) for indirect, glare-free illumination. Anchor slats with concealed clips spaced 300–600 mm apart, allowing seasonal wood movement while maintaining a flush, minimalist finish.
Textured Gypsum Finishing Techniques
Pairing textured gypsum with wood slats sets up a subtle yet deliberate material dialogue that anchors minimalist false ceilings without overwhelming the eye.
You’ll want to finish gypsum with a high-build skim coat (0.5–1.0 mm) and sand to P120–P180 grit before painting, ensuring consistent absorption when adjacent to natural or veneered slats.
- Use jointed panels with light knockdown or sponge texture and micro-seal primer for uniform paint uptake
- Fix slats to an independent subframe offset 20–40 mm below the gypsum plane for concealed LED routing and ventilation
- Seal wood with thin penetrating oil or matte lacquer to preserve visual contrast
Prep cut-outs for lighting and fans early, using perimeter reveals or 5–12 mm shadow gaps that align with slat spacing for crisp architectural lines.
Optimal Wood Species Selection
Select stable, kiln-dried species that anchor your minimalist palette without introducing warping or seasonal gaps. Prioritize white oak or American black walnut with 0.6–0.9% moisture content variance tolerance for climate-controlled living rooms. Lightweight options like teak (density ~650 kg/m³) or engineered birch plywood veneers maintain structural integrity while keeping dead load under 3–5 kg/m² on gypsum substrates.
| Species | Density (kg/m³) | Application |
|---|---|---|
| White Oak | 760 | Primary slats |
| Teak | 650 | Floating panels |
| Birch Veneer | 640 | Engineered sections |
Specify 20–40 mm slat widths with 10–20 mm gaps for acoustic control. Apply low-VOC oil finishes producing under 20% gloss to preserve grain contrast against textured gypsum. Use slotted brackets allowing 2–3 mm movement per 3 m run, preventing cracks from thermal expansion.
Creating Visual Depth Layers
When depth becomes the primary spatial strategy, layering 20–40 mm wooden slats over a recessed gypsum plane transforms a flat ceiling into a dimensional focal point without sacrificing minimalist restraint.
You’ll achieve measurable dimensionality by spacing slats 10–25 mm apart, allowing the textured base to show through and create rhythmic shadow lines.
To execute this effectively:
- Recess the gypsum layer 30–60 mm to conceal wiring and mount linear LEDs that graze light across wood grain, amplifying texture
- Alternate finishes—natural oak veneer against micro-textured matte gypsum (RAL 9010)—to enhance contrast without visual clutter
- Keep total drop within 150–300 mm to preserve headroom while achieving perceptible depth
Orient slats parallel to your room’s longest axis. This directional alignment guides sightlines and visually elongates the space, reinforcing minimalist spatial principles.
Lighting Integration Between Materials
By threading linear LED ribbon strips into the 10–15 mm reveal gap between wood slats and textured gypsum bands, you’ll convert static material shifts into luminous definition lines that sculpt both surfaces simultaneously.
Specify 120–150 lumens per foot to graze the wood grain evenly without hot spots.
Use 2700–3000K warm-white LEDs against medium-toned wood and shift to 3000–3500K neutral-white for gypsum to preserve warmth while keeping texture crisp.
Install opal diffusers or 10–15% light-transmitting foam at interfaces to prevent visible LED dotting on textured surfaces.
Zone your circuits so wood-slat accent runs and gypsum cove lighting dim independently (1–100% range), letting you adjust contrast and highlight texture based on activity while maintaining adequate backer depth for heat dissipation.
Maintenance and Longevity Tips
Moisture-resistant finishes form your first defense against the dimensional instability that plagues timber-gypsum hybrids in living spaces. Seal oak slats with PU or water-based varnish and recoat every 3–5 years to prevent warping. Specify MR-grade gypsum board for textured layers and maintain indoor RH below 60% to avoid sagging within 12–24 months.
Critical intervention points:
- Airflow clearance: Leave 25–40 mm behind slats; install breathable membranes at junctions to block dust while allowing vapor diffusion
- Fastener integrity: Use corrosion-resistant screws and adhesive beads; inspect and retighten at 2–5 year intervals as building movement occurs
- Surface care: Quarterly microfiber cleaning with pH-neutral solutions for wood; low-suction vacuuming for textured gypsum to preserve finishes
Damaged sections telegraph poor detailing—address humidity control and ventilation gaps before installation.
Room-Specific Configurations (Living, Bed, Hall)

You’ll need distinct ceiling strategies for each room type because living, bedroom, and hallway spaces demand different height-to-floor-area ratios and lighting intensities.
Open living rooms between 200–400 sq ft support central trays or linear slats with dedicated fan cut-outs and recessed LEDs to add vertical depth, while bedrooms under 200 sq ft work best with shallow cove perimeters that maintain headroom and deliver soft ambient glow.
Hallways and open-plan zones exceeding 400 sq ft benefit from geometric grids or layered panels that define circulation paths through zoned lighting and strategically offset fan placements.
Shop This Look
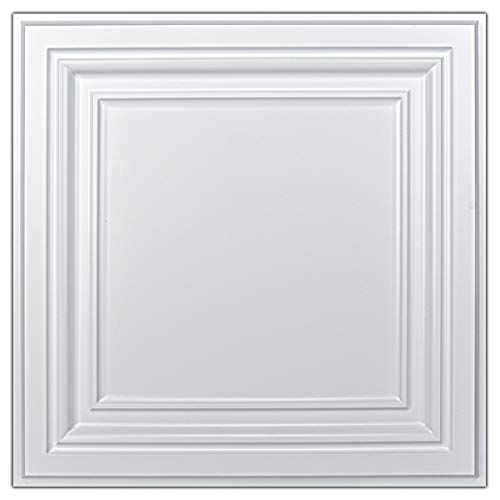
1 case of 12 Packs, 12 Count Total

Commercial standard - Class A fire-rated,low-emission, waterproof, washable, flexible and durable. No sag, rot, rust and breakage

【Premium Waterproof PVC】The Sunnyglade ceiling tile constructed using superior PVC, this product offers superior resistance to moisture, oil, rust, warping, and discoloration, ensuring long-lasting performance. The 5mm panels in thickness also with superior fire and heat resistance, enhancing safety while reducing space noise
Open Living Room Layouts
When your living room shares square footage with dining or sleeping zones, a minimalist false ceiling becomes the primary spatial divider—replacing walls while preserving sightlines and flow. You’ll typically see L-shaped or offset rectangular POP layers that define each function without fragmenting the plane.
Key strategies for open plans:
- Perimeter cove lighting runs continuously along shared boundaries, unifying areas while marking shifts with low-contrast illumination
- Offset fan placement (300–600 mm from center) aligns airflow with seating or bed while keeping the ceiling plane uncluttered
- Tray or circular ceilings work best in compact layouts under 200 sq ft, saving 10–20% versus complex systems
In larger spaces exceeding 400 sq ft, geometric layers or linear slats introduce rhythm and house recessed magnetic tracks for targeted task lighting.
Bedroom Ceiling Height Considerations
Before you commit to a false ceiling design, verify that your bedroom slab clears at least 8 feet (2.44 m)—the threshold below which layered treatments compress perceived volume and trigger a claustrophobic effect.
In compact bedrooms under 200 sq ft, opt for shallow peripheral cove lighting or a single-plane drop that preserves vertical space while delivering that minimalist hotel glow.
Reserve 12–18 inches below the slab for recessed magnetic channels, HVAC runs, and structural supports; anything less than 8 inches restricts your lighting palette and fan options.
When installing ceiling fans, maintain 7–9 inches clearance between blade tips and surrounding gypsum panels or wood slats to guarantee efficient airflow.
Retrofit projects with existing soffits demand single-drop solutions—skip multi-tier geometry that sacrifices headroom and resale appeal.
Hallway Transition Design Elements
Between public and private zones, a minimalist hallway ceiling acts as the spatial hinge that either fractures or unifies your floor plan’s visual rhythm. You’ll want to choreograph the passage with deliberate restraint:
- Shallow perimeter drop with cove LED (3–5 cm recess) creates a soft directional glow that guides movement without visual clutter, particularly effective at the hallway-to-living threshold.
- Linear slatted runs (40–60 mm slats, 10–20 mm gaps) aligned parallel to the hallway axis elongate the passage and conceal recessed strip lighting within the shadowlines.
- Subtle depth shift (10–30 mm drop or narrow tray) defines functional zones while preserving the minimalist plane.
Maintain a restricted palette—matte white plus one warm neutral—and reserve the fan for the living zone. Keep hallway ceilings dedicated to low-glare ambient lighting that protects circulation and sightlines.
Multi-Functional Space Solutions
Hallways set the stage, but rooms that serve overlapping programs—living-dining hybrids, studio sleep-work zones, or convertible guest spaces—demand ceiling strategies that organize function without physical barriers. Offset geometric layers with slightly off-centre fan mounts visually zone seating from work areas, improving perceived separation by up to 30%.
In studio layouts, linear slatted ceilings above living areas paired with tray designs over sleeping zones delineate function while limiting height loss to under six inches. Perimeter drop ceilings with backlit borders focus ambient attention on seating while leaving central fields adaptable.
For convertible rooms under 200 square feet, cove designs with indirect LEDs and central fans reduce clutter. Keep layered POP near circulation paths and limit palettes to two tones for cohesion.
Zone-Based Lighting Approaches
Across every room, effective illumination depends on matching light intensity, colour temperature, and fixture position to discrete activities rather than flooding entire volumes uniformly.
Room-specific configurations:
- Living rooms require zone-based lighting pairing warm (2700–3000K) ambient cove or tray LEDs around seating with cooler task lighting (3000–4000K) over reading nooks to create functional contrast and visual depth.
- Bedrooms benefit from layered schemes using dimmable perimeter cove lighting for sleep-friendly low lux (≤50 lux) and bedside task lights or focused downlights (150–300 lux) for reading without raising overall brightness.
- Halls need central ambient layers (200–300 lux) with accent strip or recessed spotlights (up to 500 lux) highlighting artwork or niches to guide movement and add rhythm.
Control zoning through at least three independently switched circuits—ambient, task, accent—with dimmers or smart scene presets to adapt illumination levels rapidly.
Proportional Design Room Matching
Proportional ceiling layouts succeed when dominant architectural features—trays, island drops, or slatted panels—scale to room dimensions rather than arbitrary stylistic preference. Keep primary elements to 40–60% of your room’s shorter dimension to avoid visual overwhelm.
Small living rooms under 200 sq ft demand shallow trays with central fan cut-outs and minimal LED ingress to preserve ceiling height.
Medium spaces (200–400 sq ft) support layered POP or geometric layouts; offset your fan by up to 30% of room width to zone seating from circulation.
Large halls exceeding 400 sq ft accommodate modular grids or multi-layered configurations with multiple fan positions for balanced airflow.
In bedrooms or multi-use areas, limit layer depth to 3–6 inches and favor indirect perimeter lighting to maintain calm, adaptable ambience without spatial compression.
Budget-Friendly & Apartment Solutions (No-Tear-Out)

If you’re renting or working with strict lease terms, removable panel systems and adhesive ceiling tiles let you achieve minimalist aesthetics without demolition or permanent alterations.
Tension wire grids and lightweight PVC options install over existing surfaces, adding depth and lighting channels while keeping total drop under 4 inches—well within reversible modification limits.
These renter-friendly methods use click-lock frames, adhesive-backed profiles, or suspended wire mounts that you can dismantle at move-out without patching drywall or repainting the original ceiling.
Shop This Look

Premium Materials & Durable Construction: DDMY Adhesive hooks crafted from robust stainless steel and durable PVC; high quality and longevity; remain clean and unaffected by time; non-toxic, recyclable, and transparent

【Heavy Duty Adhesive Wall Hooks & Multi-Scene Use】These 13lb load-bearing hooks are ideal for towels, coats, keys, plants and bathroom supplies. Widely used in home, kitchen, bathroom and garage. 12 Pack included

Stainless Steel Invisible Adhesive Hooks - No Drill Wall Hooks: 16 small stick on hooks in one pack, the wall hooks for hanging are made of stainless steel and plastic material,rustproof,waterproof, oilproof and strong durable. Adhesive hooks for hanging can be used in, kitchen cabinet,closet, bathroom inside shower wall, window, mirror,behind door, outdoor,classroom,dorm etc.
🌿 Renter-Friendly: Fake the False Ceiling (No Drilling)
Landlord says no? Use these peel-and-stick solutions to get the floating ceiling effect without risking your deposit.
- ✓ Peel-and-Stick Foam Crown Molding (10 Pack)
- ✓ Wood Slat Ceiling Panels (24 Pack, Peel-Stick)
- ✓ Govee Smart LED Strips (50ft, Remote Control)
- ✓ Cable Concealer Raceway (White Paintable, 10ft)
⏱️ Setup Time: 1–2 hours for a 12×12 room. Removes cleanly with zero damage.
Removable Panel Systems
Tenants and homeowners who want ceiling upgrades without permanent alterations can fall back on removable panel systems—modular grids of lightweight gypsum, MDF, or PVC panels that lift out individually for maintenance or reconfiguration.
Panels (600×600 mm to 1200×600 mm) snap into exposed or concealed aluminum tracks, keeping added depth between 40–120 mm to preserve room proportions.
Key advantages include:
- Access flexibility – Lift any panel to reach ductwork, wiring, or soundproofing inserts without demolition
- Rapid installation – Most 200–400 sq ft living rooms complete in 1–3 days with minimal patching
- Cost efficiency – 40–60% lower removal costs than solid gypsum ceilings; swap panels incrementally as needs evolve
Integrate slim LED channels or recessed downlight housings directly into the grid to maintain 2026’s minimalist aesthetic while keeping future ceiling access non-destructive.
Adhesive Ceiling Tiles
Looking to refresh overhead surfaces without gutting the existing ceiling, adhesive tiles offer a non-invasive overlay that cuts labor costs by up to 60% while preserving your landlord deposit or avoiding structural permits.
Standard 24″×24″ tiles cover 4 sq ft each—a 200 sq ft living room needs roughly 50 tiles plus 5–10% waste.
Lightweight foam or PVC (100–400 g per tile) won’t overload apartment joists, and peel-and-stick backing enables DIY installation; roll each tile firmly to eliminate air gaps and cure 24–48 hours before mounting fixtures.
Clean, dry substrates are essential for bond strength.
While adhesive tiles deliver speed and budget efficiency, they provide minimal acoustic or thermal performance—layer separate insulation or acoustic panels if soundproofing matters in your space.
Tension Wire Solutions
Key advantages include:
- Reversibility: Remove panels without wall damage when leases end.
- Integrated lighting: The 20–50 mm gap between suspended panels and the structural ceiling accommodates recessed LED strips for peripheral cove glow.
- Load limits: Maintain panel weight under 3–4 kg/m² to preserve cable tension and long-term stability.
Ensure anchors fix into solid substrate—not plasterboard—and specify fire-retardant materials for code compliance.
Lightweight PVC Options
Budget constraints and lease restrictions often rule out traditional gypsum or plaster-of-Paris systems, yet PVC panels deliver a minimalist false ceiling without structural demolition.
Weighing just 3–6 kg/m², these lightweight profiles attach directly over your existing ceiling using concealed clips or adhesive, completing a 200–300 sq ft living room in 1–3 days.
Fire-retardant and moisture-resistant formulations suit humid climates while maintaining self-extinguishing ratings and ≤1% water absorption.
Pre-cut fan mounting rings and integrated LED grooves simplify installations, reducing retrofit costs 30–50% below POP alternatives.
Maintenance involves only damp-cloth cleaning, and panels retain color 5–10 years indoors—eliminating repainting cycles.
For apartment dwellers seeking clean lines without landlord approvals or extended downtime, PVC offers no-tear-out convenience with minimalist appeal.
Renter-Friendly Installation Methods
Lease agreements and security deposits rule out permanent alterations, yet you can pull off a minimalist false ceiling using zero-commitment methods. Removable adhesive cove LED strips paired with lightweight foam crown moldings create peripheral glow effects—high-strength mounting tape supports trims up to 2 kg per linear meter without penetrating drywall. For linear slatted aesthetics, peel-and-stick wood-look PVC battens (≤10 mm thick) span wall-to-wall with construction-grade double-sided tape.
Consider these reversible techniques:
- Magnetic clip-on panels attach to small adhesive anchors, forming grid or linear systems you remove entirely when relocating
- Decorative fan rings slip over existing junction-box canopies, adding tray or dome visuals without new wiring
- Command-strip foam boards carry removable wallpaper or painted geometric patterns for layered ceiling depth
Each method preserves your deposit while delivering hotel-style minimalism.
Cost-Effective Material Alternatives
Material selection determines both upfront spend and long-term flexibility when permanent construction isn’t an option.
Lightweight gypsum or high-density POP panels (6–9 mm) attach to existing surfaces with adhesive and minimal screws, eliminating structural framing while reducing costs 25–40%.
Interlocking PVC slats or PVC-coated MDF (8–12 mm) offer moisture resistance and quick installation, cutting labor expenses roughly 30% versus traditional wood.
Spray-applied skim coats or thin microcement create seamless finishes without demolition, typically priced 40–60 INR per sq ft in budget markets.
Surface-mounted LED channel strips with faux recessed trims deliver indirect lighting effects without rewiring.
Veneer or laminated wood battens (20–50 mm width) fixed directly to substrates mimic slatted ceilings while maintaining reversibility—critical for lease restrictions.
Frequently Asked Questions
What Is the Latest Trend in False Ceiling Design?
You’ll see recessed magnetic track channels dominating 2026—they let you click spotlights anywhere along a flush rail. Pair them with shadowline gaps (10 mm ceiling-to-wall) and peripheral cove LEDs for that floating, hotel-grade minimalism.
How to Choose a False Ceiling Design?
Measure your room’s footprint and ceiling height first. Match the false ceiling profile—shadowline, cove, or island drop—to your fan placement and functional zones, then layer magnetic track or LED strips for task and ambient lighting.
Which Ceiling Is in Trend?
Linear slatted ceilings and recessed magnetic track systems lead 2026 trends. You’ll achieve a floating effect with shadowline profiles, while cove lighting adds hotel-style ambiance. Pair minimalist geometry with light oak or concrete textures for warmth.
Which Ceiling Is Best for a Living Room?
You’ll want a perimeter drop ceiling with recessed magnetic track lighting for flexible spotlights and hidden LED cove strips. It creates spatial depth, accommodates your fan centrally, and delivers clean, layered illumination—maximizing both function and minimalist aesthetics.


