


How to Winterize Your Raised Beds Before the First Frost
To winterize your raised beds before the first frost, start by evaluating your beds’ structure and soil health. Remove all dead plants and debris to prevent pests. Clean and sterilize your tools for next season. Amend the soil with organic materials like compost to enhance fertility. Apply a thick layer of mulch for insulation. Finally, consider using covers to protect plants from harsh weather. For more tips on maintaining your garden, keep exploring additional strategies.
Key Takeaways
- Assess your raised beds for structural integrity, soil health, and plant conditions before winter sets in.
- Remove dead plants and debris to prevent pest issues and improve soil health.
- Clean and sterilize gardening tools to maintain their condition and prevent disease spread.
- Amend the soil with organic matter and adjust pH to prepare for spring planting.
- Apply a thick layer of organic mulch to insulate the soil and protect against frost.
Assess Your Raised Beds
Before you plunge into winterizing your raised beds, it's essential to assess their current condition.
Start with a thorough raised bed assessment: check for structural integrity, soil health, and any signs of pests or disease. This step is critical to guarantee your beds are ready for the colder months ahead.
Next, conduct a seasonal plant evaluation by examining the remaining plants. Determine which ones are still thriving and which need to be removed. Healthy plants can be left to overwinter if they’re resilient, while others may need to be composted.
Pay attention to soil moisture levels too; well-drained soil will benefit your beds during winter. Taking these steps now sets the foundation for a successful growing season next year.
Remove Dead Plants and Debris

With your raised beds assessed and ready for winter, the next step is to remove dead plants and debris.
Begin by pulling out any dead plants, ensuring you get the roots to prevent future issues. This process is essential for effective dead plant disposal; simply leaving them can invite pests and diseases.
Gather any fallen leaves, branches, and other debris that may have accumulated, as proper debris management helps maintain soil health.
Compost what you can, but be cautious with diseased plants, which should be discarded to avoid contamination.
Clean and Sterilize Tools
Cleaning and sterilizing your gardening tools is essential for preventing the spread of diseases and pests in your raised beds.
Start with tool types like pruners, trowels, and hoes. Remove dirt and plant residue using a stiff brush or a putty knife. For deeper cleaning, soak metal tools in a solution of water and vinegar or bleach for about 10-15 minutes. Rinse thoroughly and dry immediately to prevent rust.
Wooden handles can be wiped with a cloth soaked in soapy water; avoid soaking them. Finally, disinfect your tools with a 10% bleach solution or isopropyl alcohol to eliminate pathogens.
Properly maintained tools not only last longer but also guarantee a healthier garden environment for your plants.
Shop This Look

Kills harmful organisms in just 2 mintues

Material: Made the stainless steel is rustproof and wear-resistant with strong construction excellent flexibility,durable for use

Premium Quality: Tool Daily 1/4 inch quick connect foam cannon with a white container bottle and an additional orifice nozzle 1.1 mm for foam sprayer. The container bottle has a bigger mouth to easily fill in and an extra-wide neck to prevent crack issue
Amend the Soil

To prepare your raised beds for winter, start by adding organic matter, such as compost or well-rotted manure, to enhance soil structure and fertility.
Next, test the soil pH to guarantee it falls within the ideal range for your plants, as this can affect nutrient availability.
Making these amendments now will help your soil stay healthy and ready for spring planting.
Shop This Look

Twin chambers: Two separate chambers allow one side to finish composting while leaving the other side available to add fresh wastes; Constant alternation of the two sides will create an uninterrupted stream of nutritious compost

Complete formula for composting. Enhances decomposition process for nutrient-rich compost

Organic Compost Blend: Enhance the nutrient content and soil quality of lawns and raised garden beds with this organic blend, promoting healthy plant growth and soil vitality
Add Organic Matter
As temperatures drop and plants go dormant, adding organic matter to your raised beds becomes essential for maintaining soil health.
Incorporating compost is a great way to enhance the nutrient profile of your soil, offering compost benefits like improved water retention and increased microbial activity.
This organic matter not only enriches the soil but also promotes a thriving ecosystem, fostering beneficial organisms that break down nutrients for your future crops.
Aim for a layer of 2-3 inches of well-rotted compost, mixing it in gently with the existing soil.
By doing this, you’re not just preparing your garden for winter; you’re investing in a healthier, more productive growing environment for the upcoming season.
Your plants will thank you!
Test Soil Ph
Before winter fully sets in, testing your soil's pH is essential for ensuring ideal growing conditions in your raised beds.
Soil testing helps you determine the acidity or alkalinity of your soil, measured through pH levels. Most vegetables thrive in a pH range of 6.0 to 7.5, so knowing your soil’s pH can guide your amendments.
You can use a simple home testing kit or send a sample to a lab for precise results. If your pH is too low (acidic), consider adding lime; if it’s too high (alkaline), sulfur can help lower it.
Adjusting your soil’s pH now will create a healthy environment, setting you up for successful planting come spring. Don’t skip this vital step in winterizing!
Mulch for Insulation

When winterizing your raised beds, choosing the right mulching materials is essential for insulation.
Organic options like straw, shredded leaves, or wood chips can effectively trap heat and protect your plants from freezing temperatures.
To maximize their benefits, apply a thick layer of mulch, ensuring it's evenly distributed to cover the soil completely.
Shop This Look

Includes 10lb block of Back to the Roots compressed Coconut Coir that expands to 51qt of potting soil. A balanced pH, which means it’s truly all-purpose. Use alone or as an amendment for anything in a pot or in the ground — vegetables, flowers, herbs, and even starting seeds.
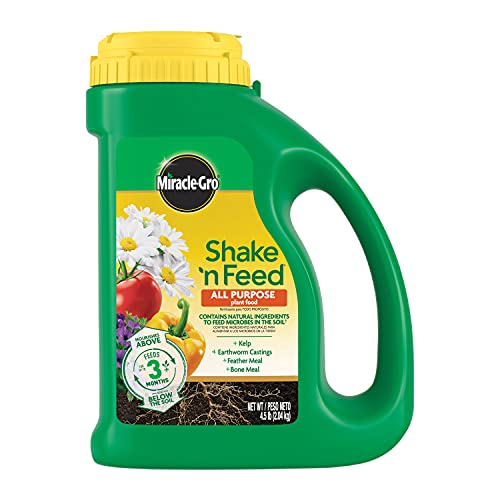
3 MONTHS OF FEEDING: Miracle-Gro Shake 'N Feed All Purpose Plant Food feeds plants for up to 3 months, and nourishes above and below the soil

SUPERCHARGE YOUR GARDEN: Elevate your plants' growth with premium organic Brut Worm Castings. Our certified organic formula guarantees optimal nutrition for your indoor and outdoor plants.
Best Mulching Materials
Choosing the right mulching materials is essential for insulating your raised beds during the winter months.
Using the proper mulch not only retains moisture but also protects your plants from harsh cold. Here are three effective options:
-
Straw: This lightweight material provides excellent insulation, and its straw benefits include being a natural barrier against pests.
-
Wood chips: These break down slowly, creating a stable layer that keeps the soil temperature regulated while enriching it over time.
-
Leaves: Shredded leaves trap air and moisture, acting as a protective blanket that decomposes into rich organic matter.
Application Techniques
To effectively insulate your raised beds for winter, applying mulch requires specific techniques that maximize its benefits. Here are some key application methods to take into account:
| Technique | Description |
|---|---|
| Layering | Add 2-4 inches of mulch evenly over the soil. This creates a thermal barrier. |
| Tucking | Tuck mulch around plant bases to protect roots from frost. |
| Watering | Lightly moisten the mulch before winter; this helps with insulation and moisture retention. |
Protect With Covers
As temperatures drop and winter approaches, protecting your raised beds with appropriate covers becomes essential for preserving soil health and plant vigor.
Using the right cover materials creates protective layers that shield your plants from frost and harsh weather.
Consider these effective options:
-
Row covers: Lightweight fabric that allows light and moisture while blocking cold winds.
-
Mulch: Organic materials like straw or leaves that insulate the soil and maintain moisture.
-
Cold frames: Mini-greenhouses that trap heat and protect delicate plants from freezing.
Consider Winter Crops
Winter crops can be a fantastic addition to your raised beds, allowing you to extend your growing season and enjoy fresh produce even in colder months.
Consider planting winter vegetables like kale, spinach, and Swiss chard, which thrive in cooler temperatures. These cold crops not only withstand frost but often taste sweeter after exposure to cold.
Before the first frost, make sure to sow your seeds or transplant seedlings to give them a head start. You might also want to use row covers or cold frames for added protection.
Plan for Spring Preparation
After enjoying the benefits of winter crops, it’s time to think about how to prepare your raised beds for spring planting.
Start by evaluating your soil health; it’s essential for successful growth.
Consider these steps for effective spring preparation:
- Clear debris: Remove any old plant material to prevent pests and diseases.
- Amend the soil: Add compost or organic matter to boost nutrient levels and improve soil structure.
- Plan your seed selection: Choose seeds suited to your climate and desired harvest, ensuring they thrive in your raised beds.
Frequently Asked Questions
What Types of Plants Are Best for Winterizing Raised Beds?
For winterizing raised beds, consider planting cold tolerant vegetables like kale and carrots along with winter herbs such as thyme and parsley. These crops thrive in cooler temperatures, ensuring your garden remains productive throughout the winter months.
How Can I Prevent Pests During Winter?
To keep pests away like a superhero, use pest traps and natural repellents. Seal your raised beds securely, and consider planting pest-repelling herbs. This creates a welcoming space for beneficial insects instead!
When Is the Ideal Time to Winterize My Raised Beds?
You should winterize your raised beds in late fall, typically a few weeks before the expected frost dates. This timing allows you to prepare for fall planting while ensuring your garden thrives come spring.
Can I Use Old Mulch for Winter Protection?
Yes, you can use old mulch for winter protection. Its benefits include insulating soil and supporting mulch decomposition, enriching the bed while creating a cozy habitat for beneficial organisms, ensuring your garden thrives come spring.
What Materials Are Best for Covers in Winter?
For winter covers, fleece blankets and plastic sheeting work best. Fleece provides insulation, while plastic protects against moisture and frost. Combine them for ideal protection, ensuring your plants stay snug and healthy during harsh weather.
Conclusion
By winterizing your raised beds, you’re not only protecting your plants but also enhancing soil health for the coming season. Did you know that gardens with proper winter preparation can yield up to 20% more produce in the spring? Taking these steps—removing debris, amending soil, and mulching—ensures your garden thrives despite harsh winter conditions. With a little effort now, you'll set the stage for a bountiful harvest when spring arrives. Get started on your winter preparations today!


