

You know that pile of fabric scraps you keep saving because “they might come in handy someday”? Same here. I finally decided to do something with mine — and let me tell you, I was not ready for how fun and creative it would be.
This post is packed with not only 15 fabric scrap crafts but now updated with 25 ideas, that turn those little leftover pieces into something seriously cool. Whether you’re already into DIY or just looking for a way to reuse what you’ve got, there’s something here that’ll spark your creativity (and maybe clear out that scrap drawer).
Let’s turn your waste into wow — one project at a time.
| Preview | Product | |
|---|---|---|
|
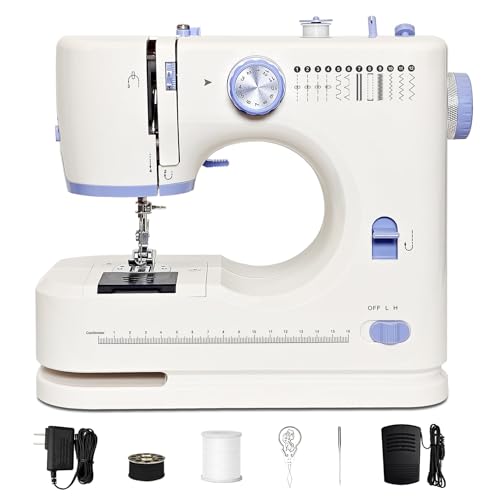
Beginner-Friendly Mini Sewing Machine with 12 Built-in Stitches, Sewing Machine with Foot Pedal,… | See Today’s Deal👇 |
1. Patchwork Pillows

This patchwork pillow instantly reminded me of my grandma’s living room — where every cushion had a story and every fabric scrap meant something. I remember sitting on the floor with a glass of red juice (the kind that always stained everything), secretly hoping I wouldn’t spill it on her “don’t touch that” sofa. She used to save old dresses, aprons, even curtains, and turn them into cozy little treasures like this. One pillow even had a corner from my old dinosaur pajamas stitched in. I was weirdly proud of that.
To get started, you’ll need some quality fabric scraps. Cut these into squares or rectangles, then sew them together using a reliable sewing machine. Once your patchwork is complete, stuff the pillows with cozy pillow stuffing for added comfort.
To ensure your stitches hold up beautifully, don’t forget to use durable sewing thread. For those new to this craft, consider a patchwork pillow tutorial book that offers step-by-step guidance. These pillows not only serve as delightful conversation starters but also provide a comfy resting spot for your head.
Patchwork Pillows Fabric Scraps
Transform your leftover fabric into cozy patchwork pillows that bring charm, color, and nostalgia to your living space. This DIY project is beginner-friendly and a perfect way to showcase your fabric scraps in a creative, practical form.
Materials You’ll Need
- Assorted fabric scraps (cotton works best)
- Sewing machine or hand-sewing kit
- Scissors or rotary cutter
- Pillow stuffing or pre-made pillow insert
- Sewing pins or clips
- Optional: patchwork pattern template
Tip: Use scraps of different textures (like cotton, flannel, or linen) for a cozy, eclectic look.
Step-by-Step Instructions
- Cut your fabric scraps into squares or rectangles of similar size.
- Arrange them into a patchwork design you love.
- Sew the pieces together row by row, pressing seams flat.
- Join the rows to create the full pillow front.
- Cut a backing piece of fabric the same size as your patchwork front.
- Sew the front and back together (right sides facing), leaving an opening.
- Turn right-side out, stuff with pillow insert or filling, then close the opening with a hidden stitch.
Styling Ideas
- Mix vintage florals with modern prints for a boho look.
- Make seasonal patchwork pillows—pastels for spring, warm tones for fall.
- Create a full set to give your sofa or bed a handmade, cozy vibe.
2. Fabric Scrap Bunting

These bunting flags took me straight back to our backyard birthday parties — the kind where we used leftover fabric from Mom’s sewing box and hung them between trees using mismatched twine and more hope than engineering. One year, the wind picked up and half the bunting flew into the neighbor’s yard… and their dog spent the rest of the afternoon proudly dragging a polka-dot triangle around like a trophy. We didn’t even care — it was sunshine, lemonade, and cake with too much frosting. Pure magic.
For a quick and easy option, a hot glue gun can be your best friend, allowing you to attach your fabric scraps to the string in no time. Once your bunting is complete, hang it in a child’s room, on a patio, or even in your craft space to add a cheerful touch to any setting!
Fabric Scrap Bunting DIY Decor
Turn your leftover fabric scraps into cheerful bunting flags that instantly brighten up parties, patios, or kids’ rooms. This no-fuss DIY project is all about color, playfulness, and giving old fabric a second life.
Materials You’ll Need
- Assorted fabric scraps (lightweight cotton or linen)
- Scissors or rotary cutter
- Sewing machine or hot glue gun
- Bias tape, twine, or ribbon for the string
- Pins or clips to hold fabric in place
Tip: Mix bold prints with solids for a bunting that really pops in photos!
Step-by-Step Instructions
- Cut your fabric scraps into triangles (or any shape you like).
- Fold the top edge of each piece over the bunting string (bias tape, ribbon, or twine).
- Sew or hot glue the fold to secure the fabric flags in place.
- Space the flags evenly, and leave extra length at each end of the string for tying or hanging.
- Hang your bunting wherever you want to add a handmade, joyful touch!
Styling Ideas
- Hang between trees for outdoor parties or baby showers.
- Use themed colors for holidays or seasonal décor.
- Create bunting with your child’s name or favorite characters for their room.
3. Upcycled Tote Bags

This patchwork tote instantly reminded me of my old neighbor, Ruth — the unofficial mayor of our street and the queen of upcycling before it was trendy. She’d head to the farmers market every Saturday, swinging her hand-sewn tote that looked just like this — mismatched fabric, a wobbly seam or two, and always a faint scent of fresh dill. She’d come home with celery taller than her, three types of mystery squash, and stories about every vendor she chatted with. That bag? It wasn’t just for groceries — it carried community gossip, recipe swaps, and a whole lot of sass.
Using a reliable sewing machine, sew the pieces together following a pattern, like this handy tote bag pattern.
Upcycled Tote Bags Eco-Friendly
Give your fabric scraps a second life by sewing them into upcycled tote bags. These stylish and practical bags are perfect for shopping, trips to the farmers market, or just carrying your everyday essentials — all while showing off your creativity.
Materials You’ll Need
- Assorted fabric scraps (medium to sturdy fabrics work best)
- Sewing machine or hand-sewing kit
- Thread and sewing pins
- Scissors or rotary cutter
- Tote bag pattern or paper template
Tip: Mix bold prints with plain fabric for a balanced, eye-catching design.
Step-by-Step Instructions
- Cut your fabric scraps into panels or squares to piece together into a bag body.
- Sew the panels together to form the front and back of the tote.
- Cut two strips of fabric for handles and fold them into sturdy straps.
- Join the front and back panels, leaving the top open.
- Attach the straps securely to the top edges.
- Finish with a lining inside for extra durability (optional).
Styling Ideas
- Use denim scraps for a durable, trendy tote.
- Add lace or ribbon trim for a feminine touch.
- Make themed bags — floral for spring, plaids for fall, festive prints for holidays.
4. Fabric Scrap Coasters

These cozy little fabric scrap coasters remind me of my aunt’s house growing up — where no cup was ever allowed to go rogue without a proper landing pad. She’d hand-make a new set every season, and if you dared put your tea down without using one? Oh, she’d give you that look. The one that said, “I birthed three children and survived dial-up internet — don’t mess with my coffee table.” Cozy, colorful, and slightly passive-aggressive in the best way.
Not only are these coasters functional, but they also allow you to showcase your sewing skills and create a matching set that enhances your coffee table aesthetics. Plus, they make fantastic gifts, especially when crafted from your favorite fabric scraps!
Fabric Scrap Coasters Easy DIY
These adorable fabric scrap coasters are the perfect way to use small leftover pieces while protecting your surfaces in style. They’re quick, fun, and make beautiful handmade gifts too!
Materials You’ll Need
- Small squares of fabric scraps (two per coaster)
- Fusible interfacing or quilt batting
- Sewing machine or needle & thread
- Iron (if using fusible interfacing)
- Scissors or rotary cutter
- Chalk or fabric marker
Tip: Choose coordinating fabrics in similar tones to create cute matching sets!
Step-by-Step Instructions
- Cut two squares of fabric and one piece of interfacing or batting, all the same size (4–5 inches works great).
- Layer the fabric squares right sides together, with interfacing on the bottom.
- Sew around the edges with a 1/4” seam allowance, leaving a small opening.
- Trim the corners and turn the coaster right side out.
- Press flat, then topstitch around the entire edge to close the opening and give it a finished look.
Styling Ideas
- Use holiday-themed scraps for seasonal coaster sets.
- Add decorative stitching in a fun shape or pattern.
- Bundle a set of four with twine for a sweet handmade gift.
5. Fabric Scrap Flowers

These fabric scrap flowers totally remind me of my cousin Tasha’s birthday party when she turned 8. My aunt had this brilliant idea to skip the real flowers and DIY the entire bouquet from old pajamas and curtains. She even made one with glittery socks (still don’t know why they were glittery). Anyway, halfway through the party, Tasha tried to sniff them dramatically during “Happy Birthday” and got a puff of lint right up her nose. Full-on sneezing fit mid-candle-blow. Cake frosting everywhere. We still call that bouquet “The Sneeze Arrangement.”
Don’t forget to use floral wire to add structure and support to your flowers, ensuring they look vibrant and full. These whimsical fabric flowers will undoubtedly add a personal touch and a splash of color to any space!
Fabric Scrap Flowers Whimsical Craft
Create stunning everlasting blooms with leftover fabric! These fabric scrap flowers are a cheerful, eco-friendly way to brighten up your home or give as heartfelt handmade gifts. They’re fun to make and look like real blossoms—without any watering required!
Materials You’ll Need
- Scraps of fabric in various colors and textures
- Fabric stiffener or Mod Podge
- Scissors
- Hot glue gun or fabric glue
- Floral wire and green floral tape
- Optional: Buttons or beads for centers
Tip: Mix and match floral prints and solids for an extra romantic look!
Step-by-Step Instructions
- Cut petal shapes from your fabric scraps. Use different sizes for a layered look.
- If using, brush petals lightly with fabric stiffener and let dry flat.
- Arrange petals into a flower shape, overlapping slightly, and glue in place.
- Add a small button or bead to the center for charm.
- Attach floral wire to the back using glue, then wrap with green floral tape to create the stem.
Creative Ideas
- Bundle several together in a small mason jar for a no-maintenance bouquet.
- Use as napkin ring toppers or wreath accents.
- Attach to hair clips or headbands for a sweet vintage look.
6. Quilted Table Runner

Sewing Tutorial
Heirloom-Style Patchwork Table Runner (Beginner Friendly)
A scrappy, cozy runner you can make in a weekend — designed to look like it’s been passed down for generations.
That table runner? It looks almost exactly like the one my aunt would pull out every Thanksgiving—stitched together from old aprons, faded pillowcases, and that one red-checkered dress she wore way too often in the ’80s. Every square held a story, and while the turkey roasted, we’d sit around the table “remembering.” Like how Grandpa once mistook cranberry sauce for beets (and acted like it was no big deal). Or how Mom burned the rolls again but saved them by calling it “extra toasty.” That quilted runner wasn’t just decor. It was like a scrapbook we could spill gravy on. And somehow, even now, when I see patchwork like this, I feel like I’m back in that dining room—warm, loud, and full of pie.
Finished Size
14″ × 72″ (fits most dining tables)
Materials
Fabric & Notions
- Scraps / fat quarters (florals & vintage prints look best)
- 1/4 yd for skinny sashing strips
- Backing: 16″ × 74″
- Batting: 15″ × 73″
- Binding: 2.5″ strips totalling ~ 172″
Cutting
- 54 squares — cut at 4.5″ × 4.5″
- 2 sashing strips — cut at 1.5″ × 74″
Why these numbers? Finished width = 3 × 4″ + 2 × 1″ = 14″
Step-by-Step
- Sew 18 squares into a long column. Make 3 columns.
- Sew sashing strips between the columns.
- Square up edges and press.
- Make your quilt sandwich: backing → batting → patchwork top.
- Quilt using stitch-in-the-ditch or straight lines.
- Trim edges.
- Add binding.
Resizing
- Add/remove rows of squares to make longer or shorter
- Use 5″ charm squares if you prefer larger blocks
Do I need batting?
Batting gives the runner body so it lays flat.
Can I quilt by hand?
Yes — big-stitch hand quilting looks gorgeous.
7. Fabric Scrap Jewelry

Elevate your accessory game by crafting stunning jewelry pieces from fabric scraps.
With the right fabric scraps, you can create everything from fabric-covered beads to charming bracelets and even statement earrings that showcase your unique style.
To ensure your creations hold their shape, consider using fabric stiffener for added durability.
Don’t forget to enhance your designs with bead caps and a variety of jewelry making supplies to truly make each piece your own.
This DIY project not only sparks creativity but also serves as a fun way to repurpose leftover fabric into eye-catching accessories that are distinctly yours!
Fabric Scrap DIY
Fabric Scrap Jewelry – Make Beads, Earrings & a Wrap Bracelet
Turn tiny leftovers into fresh, wearable art. Beginner-friendly, low-cost, and insanely customizable.
Why it works: With the right scraps, you can make fabric-covered beads, wrap bracelets, and statement earrings that are light, durable, and totally unique. Use a fabric stiffener where noted for crisp shape, and finish with basic jewelry findings.
Materials
Fabric & Adhesives
- Small cotton scraps (quilt/fashion weight)
- Fabric stiffener or Mod Podge (matte)
- Clear-dry craft glue or E6000 (sparingly)
Findings & Tools
- Wood beads (8–14 mm), memory wire or bracelet wire
- Hoop earring findings (35–50 mm), jump rings, ear wires
- Head pins/eye pins, bead caps, crimp beads, chain (optional)
- Scissors/rotary cutter, round-nose pliers, wire cutters, paintbrush
Nice-to-Have
- Awl / skewer for bead holes
- Small circle/flower punches for applique
- Fray-check for raw edges
Prep: Press your scraps. For very soft fabric, brush a light coat of fabric stiffener, let dry, then cut — cleaner edges and longer-lasting pieces.
Tutorial 1 — Fabric-Covered Bead Necklace
- Cut strips: ½–¾" × 4–6" depending on bead size.
- Brush a thin coat of Mod Podge on a wood bead. Starting at the hole, spiral-wrap the strip around the bead, smoothing as you go.
- Tuck the tail near the hole with a dab of glue. Skewer through the hole and set on a cup to dry 30–45 min.
- Seal with a light top coat (optional for matte finish, two coats for satin).
- String on cord or chain, adding bead caps or metal spacers between colors. Finish with a clasp.
Tutorial 2 — Floral Hoop Earrings
- Back a small scrap with fabric stiffener; let dry until crisp.
- Cut tiny flowers/leaf shapes (or use a small punch). Stack pieces and glue into micro-florals.
- Open a jump ring and attach a little floral cluster to the bottom third of a hoop finding. Repeat to balance left/right.
- Add a bead dangle on a head pin if you want movement; attach to the hoop with a jump ring.
- Close the hoop and attach ear wires. Make sure both earrings mirror each other.
Tutorial 3 — Soft Wrap Bracelet
- Cut a strip: 1¼" × 18–24" (join shorter pieces with a diagonal seam).
- Fold long edges to the center, then fold again to make a ¼" tape. Stitch down the length (or glue with fabric glue and press).
- Thread onto memory wire or keep as a fabric tie. Add a charm/bead at each end and knot or crimp to secure.
- Wrap around the wrist 2–3× and tie, or form a closed bangle on memory wire.
Finishing & Durability
- Seal high-friction areas with a thin coat of Mod Podge or clear fabric glue.
- Let pieces cure 24 hours before wearing.
- For washable items, stick to cotton and matte Mod Podge; spot-clean only.
Can I use knit/T-shirt scraps?
Yes, but stabilize first with fabric stiffener or fuse to lightweight interfacing, then cut. Otherwise edges can curl.
Metal allergies?
Choose nickel-free or stainless findings. You can also use waxed cotton cord with sliding knots to avoid metal contact.
How do I keep edges from fraying?
Use pinking shears, add a tiny line of Fray-Check, or seal with a very light coat of Mod Podge.
✨ Style idea: keep a palette (mint, lilac, coral) and mix prints so no two matching fabrics sit side-by-side.
8. Fabric Scrap Keychains

Elevate your key organization game with charming fabric scrap keychains that combine functionality and style.
Using fabric scraps, you can select vibrant shapes or unique designs to sew together.
Don’t forget to grab a pair of sharp scissors for precise cutting!
Once your pieces are ready, a sewing machine will make the assembly quick and easy.
For added durability, consider applying some fabric stiffener to ensure your keychains maintain their shape.
These delightful projects are not only perfect for using up those tiny scraps but also make thoughtful gifts for friends and family, infusing a personal touch into everyday items.
Fabric Scrap Keychains Adorable & Gift-Ready
Turn your tiniest fabric scraps into adorable keychains that make perfect gifts or charming additions to your purse or backpack. These are quick to whip up and let you show off your favorite prints in a functional way.
Materials You’ll Need
- Small fabric scraps (cotton works best)
- Fusible interfacing or felt for structure
- Key ring or swivel hook
- Thread, needle or sewing machine
- Scissors, iron
- Optional: Decorative buttons or trims
Tip: Personalize with initials or tiny embroidered designs!
Step-by-Step Instructions
- Cut two identical shapes (hearts, squares, circles) from fabric and one from interfacing or felt.
- Layer fabric with interfacing in between. Sew around the edges, leaving a small gap.
- Turn inside out if needed, or top-stitch closed.
- Attach your key ring securely using a small fabric loop or metal grommet.
- Add finishing touches like buttons, lace trim, or tiny hand stitches.
Cute Ways to Use Them
- Give them away as party favors or teacher gifts
- Make a matching set for your keys and bag
- Stitch a tiny label on the back with a name or date
9. Fabric Scrap Wall Art

Transform your walls into a canvas of creativity with stunning fabric scrap wall art that reflects your personal style.
Begin by gathering your leftover fabric pieces and arranging them on a canvas board to create a unique pattern or design that resonates with you.
For a more personalized touch, consider crafting fabric-covered letters to spell out a meaningful word or phrase. To securely attach your fabric, a reliable hot glue gun or fabric adhesive will ensure everything stays in place.
Once your masterpiece is complete, enhance the presentation with wall hanging kits that make displaying your art a breeze. This project not only revitalizes your leftover fabric but also adds a personal touch to your living space.
Fabric Scrap Wall Art Textured & Statement-Worthy
Bring texture and warmth to your space with this fabric scrap wall art tutorial. It’s the perfect way to turn leftover textiles into a gallery-worthy centerpiece that adds rustic charm and creative flair to any wall.
What You’ll Need
- Fabric scraps in various colors and textures
- Wood board or canvas panel
- Mod Podge or fabric glue
- Foam brush or paintbrush
- Scissors
- Optional: frame, matte varnish, washi tape
Tip: Use textured fabrics like linen, lace, or corduroy for extra depth and visual interest.
How to Make It
- Cut your fabric scraps into rectangles or squares. Mix sizes and colors for variety.
- Lay out your design on the board or canvas before gluing to find the perfect layout.
- Use Mod Podge or fabric glue to adhere the scraps onto the surface, pressing out any bubbles.
- Let dry completely, then optionally seal with another thin layer of Mod Podge for a finished look.
- Hang solo or combine with other framed pieces for a full gallery wall effect.
Why You’ll Love It
- Eco-friendly and totally unique
- Perfect for adding handmade charm to minimalist or boho decor
- Easy to scale up for larger wall spaces
10. Fabric Scrap Bookmarks

Encourage a love for reading with delightful fabric scrap bookmarks that are both practical and aesthetically pleasing. To create these charming bookmarks, start by cutting fabric scraps into long strips. For added durability, layer them with interfacing sheets before sewing along the edges.
You’ll find that a good pair of scissors will make cutting the fabric scraps much easier, while a reliable sewing machine will help you create professional-looking finishes.
These bookmarks not only serve a functional purpose but also make thoughtful gifts for fellow book lovers, adding a unique touch of handmade charm to their reading experience. To help with the design process, consider using bookmark templates that guide you in creating the perfect shape and size.
10. Fabric Scrap Bookmarks
Encourage a love for reading with these charming fabric scrap bookmarks. They’re not just practical — they’re a cute way to use leftover fabric while adding some handmade love to your next reading session.
🧵 What You’ll Need:
- Fabric scraps (lightweight cotton works best)
- Fusible interfacing (for structure)
- Scissors or rotary cutter
- Sewing machine or needle & thread
- Iron & ironing board
- Bookmark template (optional)
✨ How To Make Them:
- Cut two pieces of fabric and one piece of interfacing using a bookmark shape (around 2″ x 6″ is standard).
- Iron the interfacing onto the wrong side of one fabric piece.
- Place the two fabric pieces right sides together, and sew around the edges — leave a small opening for turning.
- Trim corners, turn right side out, and press flat with the iron.
- Topstitch around all edges to close the gap and add a nice finish.
These sweet little bookmarks make perfect gifts for book lovers, teachers, or even party favors. You can also personalize them with embroidery, ribbon loops, or fabric paint if you’re feeling extra crafty.
11. Fabric Scrap Dog Toys

Pamper your furry friend with engaging and durable dog toys crafted from fabric scraps.
You can easily sew or braid together pieces of fabric to create a variety of fun toys, including chew toys, tug ropes, or plush companions that your dog will adore. To get started, consider using fabric scraps for your creations.
If you’re looking for inspiration, check out these dog toy patterns that will guide you in making the perfect toys.
To ensure your projects are sturdy and last through hours of play, invest in a reliable sewing machine and choose durable fabric that can withstand your dog’s chewing.
Finally, for added comfort and fluffiness, don’t forget to include some stuffing inside your plush toys. This project not only provides endless entertainment for your pet but also allows you to recycle fabric in a creative and enjoyable way!
11. Fabric Scrap Dog Toys
Turn leftover fabric into adorable DIY dog toys your pup will love! These toys are soft, safe, and seriously fun to make. Plus, they’re a sustainable way to use up scraps — and they make great handmade gifts for dog parents 🐶🎁
🧷 Supplies You’ll Need:
- Sturdy fabric scraps (denim, canvas, fleece, or cotton)
- Scissors or rotary cutter
- Sewing machine (or needle & strong thread)
- Optional: squeaker insert or crinkle material
- Stuffing (polyfill, scrap fabric bits, or old socks)
- Chalk or washable fabric marker (for drawing shapes)
🪡 How To Make a Simple Dog Bone Toy:
- Draw a bone shape (or any shape your pup will enjoy!) on the wrong side of the fabric and cut two identical pieces.
- Place right sides together and sew around the edges, leaving a 2-inch gap for turning.
- Turn it right side out, stuff with filling or scraps, and insert a squeaker if desired.
- Sew the opening shut with a strong topstitch all the way around for extra durability.
You can also braid long fabric strips for tug toys, or make mini knotted chew toys — just be sure to use safe, washable fabrics and monitor your dog while they play. Who knew scrap fabric could lead to so much tail-wagging joy?
12. Fabric Scrap Phone Cases

Protect your phone with a stylish and personalized fabric scrap phone case.
Start by selecting your favorite fabric pieces, and for a professional finish, consider using this phone case pattern to guide your design.
Sew them together using a reliable sewing machine to create a padded case that fits your device perfectly.
To give your case added structure and durability, don’t forget to incorporate fusible interfacing within your design.
Lastly, gather all your materials securely with sewing pins to keep everything in place as you sew.
This DIY project not only allows you to showcase your individuality but also ensures your phone remains safe from bumps and scratches.
12. Fabric Scrap Phone Cases
Protect your phone with a stylish and personalized fabric scrap phone case. This beginner-friendly project adds charm to your everyday accessory while giving leftover fabric a new purpose.
🧵 What You’ll Need:
- Assorted fabric scraps
- Fusible interfacing
- Phone case pattern
- Sewing machine & sewing pins
- Scissors & thread
📱 How to Make It:
- Select your favorite fabric scraps and arrange them into a fun patchwork design.
- Use a phone case pattern to trace and cut the right shape.
- Iron on fusible interfacing to the fabric for added strength.
- Sew the pieces together with a sewing machine to create a snug case.
- Pin everything in place with sewing pins before your final stitch-up.
This DIY not only lets you show off your creativity, but it also keeps your phone safe from bumps and scratches. Perfect for gift-giving or a weekend craft session. 💕📱
13. Fabric Scrap Aprons

Transform your cooking or crafting experience with a stylish custom fabric scrap apron that truly reflects your individuality.
By sewing together various fabric pieces, you can create a one-of-a-kind apron that is not only practical but also makes a bold fashion statement. To get started, check out these apron patterns which can guide you in designing your masterpiece.
Don’t forget to gather some vibrant fabric scraps that will add character and flair to your project.
A reliable sewing machine will make the sewing process smooth and enjoyable, while sewing pins can help keep your fabric pieces securely in place as you bring your creative vision to life.
Adding pockets or delightful embellishments will not only enhance its functionality but also elevate its charm, making it the perfect companion for any creative chef or craft enthusiast.
13. Fabric Scrap Aprons
Transform your cooking or crafting time into a celebration of creativity with a handmade apron made entirely from leftover fabric scraps. This charming DIY is perfect for gifting, baking, or just brightening up your everyday routines.
✨ What You’ll Need:
- Assorted fabric scraps (cotton works best)
- Basic apron pattern or an apron you already own
- Sewing machine and matching thread
- Scissors or rotary cutter
- Optional: interfacing for structure
- Pins or sewing clips
- Iron and ironing board
🧵 How To Make It:
- Choose Your Palette: Gather a mix of fabric scraps in complementary colors and patterns. Soft florals and cheerful solids look lovely together.
- Make Your Apron Front: Cut your scraps into rectangles or squares, and sew them together like a quilt to create a larger fabric panel. Press seams flat as you go.
- Trace and Cut: Use an apron pattern or an old apron as a template. Trace your shape onto the patchwork fabric and cut it out.
- Cut the Backing: Cut a piece of backing fabric in the same size for the reverse side. You can also add interfacing between the layers for structure.
- Assemble: Place the patchwork front and the backing right sides together. Pin them, sew around the edges, and leave a small opening. Turn it right side out and press.
- Topstitch: Sew all around the edge again with a topstitch to secure and close the gap. This gives a clean, finished look.
- Add Straps: Sew on ties made from leftover fabric or ribbon. You can attach neck and waist straps, or use adjustable D-rings if you want a more polished look.
- Optional Pockets: Want extra charm? Add one or two front pockets made from scrap fabric — perfect for spoons, scissors, or snacks!
This project is not only fun and practical — it’s also a beautiful way to turn fabric scraps into something functional and fashion-forward. Whether you wear it in the kitchen, garden, or craft room, your apron will feel like a hug from your creative self.
14. Fabric Scrap Wall Hanging

Transform your living space with a breathtaking fabric scrap wall hanging that adds both texture and warmth to your home.
To get started, gather your favorite fabric scraps, which can come in various shapes, colors, and textures.
Experiment with layering these pieces to create a one-of-a-kind design that reflects your artistic flair.
For assembling your masterpiece, a reliable hot glue gun will be your best friend, ensuring that each fabric piece stays securely in place.
Don’t forget to have a good pair of scissors on hand for precise cutting.
If you want to streamline the process, consider using wall hanging kits that come equipped with everything you need to create a stunning display.
Finally, hang your artwork on a stylish tapestry rod to complete the look and enjoy the compliments from family and friends!
Fabric Scrap Wall Hanging Boho Decor
Turn your living room wall into a cozy masterpiece with this textured and colorful fabric scrap wall hanging. It’s the perfect way to use up leftover fabric and add a warm, handmade touch to your space.
Materials You’ll Need
- Fabric scraps (varied colors, textures, and prints)
- Hot glue gun or sewing machine
- Scissors or rotary cutter
- Wall hanging kit or tapestry rod
- Optional: Trim, fringe, or ribbon for bottom edge
Tip: Mix neutral tones with a few bold pops of color for a modern boho vibe!
Step-by-Step Instructions
- Lay out your fabric scraps and decide on the arrangement you like most.
- Cut them into uniform rectangles or squares for a quilt-like look.
- Sew the scraps together in rows, then attach the rows to form a full panel.
- Add fringe or decorative trim to the bottom if desired.
- Attach the top edge of your panel to a tapestry rod or wall hanging dowel.
- Hang it up and admire your beautiful handmade wall art!
Styling Ideas
- Hang above a sofa or bed to add texture and warmth.
- Use soft lighting or fairy lights to highlight the fabrics.
- Pair with matching pillows for a cohesive look.
- Create a smaller version for nooks, offices, or entryways.
15. Fabric Scrap Gift Wrap

Elevate your gift-giving game with unique fabric scrap gift wrap that adds a personal touch to every present.
Instead of using traditional wrapping paper, consider wrapping your gifts in vibrant fabric scraps, which can be easily sourced from fabric scraps. To complete the rustic look, tie your gifts with twine or colorful ribbon, adding an extra layer of charm.
This eco-friendly option not only minimizes waste but also allows your creativity to shine through, making your gifts truly stand out. Don’t forget to use sharp scissors for precise cutting and consider adding personalized gift tags for that extra special touch. If you need to secure any fabric edges, a reliable fabric adhesive can come in handy, ensuring your wrapping looks polished and professional.
Fabric Scrap Gift Wrap DIY Decor
Add a heartwarming, handmade touch to your presents with this charming fabric scrap gift wrap idea. It’s perfect for birthdays, holidays, or just-because gifts — and it’s sustainable, too!
Materials You’ll Need
- Fabric scraps in various prints and colors
- Sharp scissors or rotary cutter
- Twine, jute, or decorative ribbon
- Optional: gift tags, greenery sprigs, or buttons
- Fabric adhesive or double-sided tape (optional)
✨ Tip: Mix solids with florals for a layered, boutique-style gift presentation.
Step-by-Step Instructions
- Trim your fabric scraps into strips or squares depending on your design preference.
- Fan-fold or pleat the fabric and layer multiple pieces together for extra dimension.
- Tie the center tightly using twine or ribbon to form a decorative rosette or bow.
- Secure the wrapped fabric onto your gift box using twine, tape, or fabric glue.
- Add embellishments like a small tag, a pine sprig, or a wooden bead for flair.
Styling Ideas
- Use neutral linen fabric with a pop of patterned color for an elegant, rustic look.
- Attach name tags or hand-written notes to personalize each gift.
- Layer different textures like lace or burlap under your fabric bow for depth.
- Wrap baked goods, candles, or small books with soft flannel scraps for cozy gifting.
16. Fabric Scrap Magnets

Brighten up your fridge or magnetic board with whimsical fabric scrap magnets that are both practical and decorative.
Start by cutting your fabric scraps into fun shapes like stars, hearts, or even simple circles, applying a layer of fabric stiffener to maintain their form.
Once your fabric shapes are ready, attach small magnets to the back using a strong craft adhesive, ensuring they stay secure and functional.
These magnets not only add a pop of color to your kitchen or workspace but also make excellent gifts, showcasing your creativity in a compact form.
Imagine a fridge adorned with a variety of patterns, each magnet telling its own story, turning an everyday appliance into a canvas of artistry!
Fabric Scrap Magnets DIY Decor
Turn your refrigerator into a colorful little gallery with these adorable fabric scrap magnets! They’re cute, functional, and the perfect way to reuse leftover fabric in the most charming way.
Materials You’ll Need
- Small fabric scraps in fun colors and prints
- Strong round magnets or magnet strips
- Hot glue gun or strong craft glue
- Cardboard, felt, or wood bases (optional)
- Scissors or rotary cutter
- Buttons, lace, or trim for embellishing (optional)
💡 Tip: Use thicker fabric or a felt backing for magnets that keep their shape better.
Step-by-Step Instructions
- Cut your fabric scraps into small shapes like hearts, circles, squares, or flowers.
- Optional: Add a backing layer of felt, cardboard, or wood to stiffen the shape.
- Embellish your shapes with buttons, stitching, or tiny ribbons if desired.
- Glue the magnet securely to the back of your shape using hot glue.
- Let it dry completely, then test it on your fridge or any metal surface.
Styling Ideas
- Make holiday-themed sets — hearts for Valentine’s, stars for 4th of July, pumpkins for fall.
- Create photo holders by adding a mini clip behind the magnet.
- Use layered fabrics or quilt-style patchwork for a boho look.
- Package a few together as a handmade gift set for teachers or friends.
17. Fabric Scrap Hair Accessories

Add flair to your hairstyle with charming fabric scrap hair accessories, such as headbands, hair ties, or clips that reflect your personal style.
Begin by selecting colorful fabric scraps and cutting them into strips or shapes that can be easily sewn or glued onto your accessories.
For a simple yet chic look, wrap fabric around hair ties or create fabric-covered clips that add a unique touch to any outfit.
These accessories not only enhance your hairdo but also allow you to express your creativity through fabric combinations and patterns that resonate with you.
Visualize a collection of hair accessories displayed in a bright, sunny room, each piece vibrant and full of personality, making every hair day a special occasion!
Fabric Scrap Hair Accessories DIY Style
Give your hairstyle a handmade twist with these adorable fabric scrap hair accessories. From scrunchies to bows, this easy DIY is the perfect way to add soft, colorful charm to your look — all while reusing leftover fabric!
Materials You’ll Need
- Fabric scraps (cotton, jersey, or flannel works best)
- Elastic bands or hair ties
- Needle & thread or hot glue gun
- Scissors or rotary cutter
- Measuring tape or ruler
- Optional: fabric stiffener or interfacing for bows
✂️ Tip: Match your fabric colors to outfits or seasonal themes — think pinks for spring, gingham for summer, or cozy flannel for fall!
Step-by-Step Instructions
- Cut a rectangle of fabric approx. 18″ x 4″ for a scrunchie or 6″ x 2″ for a bow.
- Fold the fabric lengthwise (right sides together) and sew along the edge, leaving ends open.
- Turn the tube right side out and thread an elastic band through it.
- Sew the ends of the elastic together, then sew or glue the fabric ends closed.
- For bows: fold a shorter strip into a bow shape and tie or glue it to your scrunchie or hair tie.
Styling Ideas
- Make matching sets for moms and daughters.
- Use holiday-themed fabrics for festive flair.
- Gift a trio of handmade scrunchies in a cute fabric pouch.
- Layer bows and scrunchies for a fuller, trendy look.
18. Fabric Scrap Key Holders

Keep your keys organized in style with fabric scrap key holders that combine functionality with artistic flair.
Using sturdy fabric scraps, create colorful pockets or pouches that can be mounted on a wall or placed on a tabletop.
Consider adding small hooks or loops for hanging keys, ensuring easy access while keeping them beautifully presented.
These key holders not only serve a practical purpose but also act as a captivating piece of wall art, showcasing your creative use of fabric.
Picture a beautifully coordinated entryway adorned with these holders, each one a vibrant splash of color that welcomes you home!
19. Fabric Scrap Travel Pouches

Travel in style with fabric scrap pouches that keep your essentials organized and easily accessible on the go.
Select vibrant fabric scraps and stitch them into various sizes of pouches, perfect for holding makeup, toiletries, or even tech accessories.
Consider adding a zipper or snap closure to keep your items secure, while a variety of patterns can reflect your personality and flair.
These travel pouches not only serve a practical purpose but also allow you to showcase your crafting skills, making every trip a little more stylish.
Imagine a set of coordinating pouches nestled in a suitcase, each one bursting with color and creativity, ready to accompany you on your adventures!
✈️ Fabric Scrap Travel Pouches
Travel in style with handmade fabric pouches that are perfect for organizing toiletries, makeup, chargers, and little things that always get lost at the bottom of your bag. They’re simple, cute, and totally customizable!
🧵 Materials You’ll Need:
- Fabric scraps (medium-weight cotton or canvas works great)
- Zippers (7–9 inches long)
- Scissors or rotary cutter
- Thread and pins
- Sewing machine or needle (if sewing by hand)
- Optional: Fusible interfacing for added structure
🪡 Step-by-Step Instructions:
- Cut your fabric: Choose two pieces of fabric for the outside and two for the lining (approx. 9″ x 5″). Cut interfacing if using.
- Attach the zipper: Place one outer fabric right-side up, lay the zipper on top (facing down), then line up the inner fabric facing down. Pin and sew along the top edge.
- Repeat for the other side: Layer the remaining outer and inner pieces with the other side of the zipper and sew again.
- Press and topstitch: Press the fabric away from the zipper and topstitch for a clean finish.
- Assemble the pouch: Unzip halfway. Pin right sides together (outer to outer, lining to lining). Sew all the way around, leaving a 2″ gap at the bottom of the lining.
- Turn and finish: Turn the pouch right side out through the gap. Stitch the lining closed and tuck it in.
🌸 Styling Ideas:
- Make a matching set in coordinating fabrics
- Use bright florals or calming neutrals depending on your vibe
- Add a ribbon loop or label tag for gifting
- Embroider initials or motifs for a personal touch
✨ Tip: You can batch-make these pouches in one sewing session—perfect for last-minute gifts or travel prep!
#TravelEssentials
20. Fabric Scrap Plant Hangers

Bring a touch of greenery indoors with eye-catching fabric scrap plant hangers that add charm and personality to your home.
Utilize colorful fabric scraps to create macramé-style hangers or simple pouches that cradle your favorite plants.
These hangers not only elevate your plants but also enhance your decor, transforming any room into a vibrant oasis.
Consider experimenting with different knotting techniques or layering fabrics for a unique, textured look that stands out.
Visualize a sunlit corner of your home adorned with lush greenery and creatively draped fabric hangers, creating a serene and inviting atmosphere that celebrates nature!
Fabric Scrap Plant Hangers
Turn leftover fabric into charming macramé-inspired plant hangers that instantly brighten up your space.
🧵 Materials You’ll Need:
- Colorful fabric scraps (cotton or linen work best)
- Twine, jute, or cotton rope (about 3–5 mm thick)
- Hot glue gun or fabric glue
- Scissors
- Small or medium-sized flower pot
- Optional: wooden ring for top hook
🪢 Step-by-Step Instructions:
- Cut your rope into 4 long strands, about 1.2–1.5 meters each. Fold them in half and loop through the wooden ring or tie a large knot at the top to hold them together.
- Divide strands into 4 pairs and tie an overhand knot about 10–15 cm down each pair.
- Connect the strands by tying the adjacent cords from neighboring pairs together. Repeat until you form a net-like pattern big enough to hold your pot.
- Wrap or glue fabric scraps around some rope sections for a colorful patchwork look. You can also braid or tie the fabric strips into bows for extra flair.
- Gather all ends below the pot and tie into a secure knot. Trim excess rope to desired length.
- Insert your plant pot into the center and hang in a sunny corner!
✨ Styling Ideas:
- Use coordinating pastel fabrics to match your room’s aesthetic
- Hang in sets of 2–3 near a window or balcony
- Combine with string lights for a cozy, boho vibe
- Mix in herbs like mint or basil for a functional indoor garden
🌿 Pro Tip: If you want to avoid sewing, use iron-on fusible webbing or fabric glue for attaching scraps!
21. Fabric Scrap Phone Stand

Create a stylish and functional phone stand using your fabric scraps, perfect for keeping your device upright while you watch videos or video chat.
Begin by cutting sturdy fabric scraps into a triangular shape, ensuring that it’s wide enough to support your phone securely. You can reinforce the structure with some cardboard or interfacing for added stability.
Sew or glue the fabric pieces together, adding embellishments like pockets for charging cables or even a decorative button to enhance its aesthetic appeal.
Imagine a cozy nook where your vibrant phone stand adds a pop of color to your desk while keeping your phone within easy reach, blending practicality with creativity effortlessly!
Fabric Scrap Phone Stand DIY Craft
Create a stylish and functional phone stand using leftover fabric scraps. This quick DIY is perfect for keeping your phone upright while watching videos, video chatting, or simply brightening up your desk space.
✨ Materials You’ll Need
- Sturdy fabric scraps (cotton or linen work well)
- Cardboard or fusible interfacing (for structure)
- Scissors or rotary cutter
- Sewing machine or hot glue gun
- Optional: small embellishments (buttons, ribbon, or lace)
Tip: Choose fabrics in fun, colorful prints to add personality to your stand. Patchwork designs look especially charming!
🪡 Step-by-Step Instructions
- Cut: Cut your fabric scraps into a triangular or pyramid-shaped pattern, large enough to support your phone.
- Reinforce: Insert cardboard or interfacing inside the fabric pieces to add stability.
- Sew/Glue: Stitch or hot glue the fabric pieces together, leaving one side open to add a bit of stuffing or rice for weight (optional).
- Close: Finish sewing or gluing the last edge to seal your stand.
- Decorate: Add buttons, ribbons, or a small pocket for charging cables if you’d like extra functionality.
🌸 Styling Ideas
- Match the fabric stand with your desk accessories for a coordinated look.
- Create multiple stands in different colors to gift to friends or family.
- Use pastel or floral fabrics for a softer, feminine aesthetic.
22. Fabric Scrap Table Mats

Add a personal touch to your dining experience with charming table mats crafted from fabric scraps that showcase your unique style.
Cut your fabric into uniform rectangles or circles, layering different patterns for a bold, eclectic look that sparks joy at every meal. You can use fabric glue or a sewing machine to secure the layers together, ensuring they are sturdy enough for daily use.
Consider incorporating a waterproof backing to make them more practical and easy to clean, allowing you to enjoy your meals without worry.
Visualize a beautiful dining table set with your vibrant table mats, each one telling a story of creativity and sustainability, enhancing the atmosphere of every gathering!
✨ Fabric Scrap Table Mats
Add a personal touch to your dining experience with charming table mats crafted from fabric scraps that showcase your unique style. Perfect for everyday meals or special gatherings, these mats are both practical and delightful.
🧵 Materials You’ll Need
- Assorted fabric scraps (cotton or linen works best)
- Scissors or rotary cutter
- Sewing machine or fabric glue
- Optional: waterproof backing fabric
- Thread, pins, or clips to hold pieces in place
Tip: Mix floral prints with solids for mats that really pop against your dishes!
📖 Step-by-Step Instructions
- Cut your fabric into uniform rectangles or circles, depending on the shape you’d like for your mats.
- Layer different fabric patterns to create a patchwork effect full of charm and personality.
- Sew the layers together using a sewing machine, or use fabric glue if you prefer a no-sew option.
- For extra durability, attach a waterproof backing to the underside of each mat.
- Press your mats with an iron for a polished, professional look, then set them on your table to admire!
🌸 Styling Ideas
- Use seasonal colors (pastels for spring, deep tones for fall) to refresh your table throughout the year.
- Create matching napkin rings with leftover scraps for a coordinated dining set.
- Layer the mats with a neutral tablecloth to let the vibrant patterns shine.
23. Fabric Scrap Pet Bandanas

Pamper your furry friend with stylish fabric scrap bandanas that not only look adorable but also reflect their personality.
Cut your fabric scraps into triangle shapes that can easily be tied around your pet’s neck, ensuring a perfect fit for comfort. You can mix and match various fabrics to create unique designs, letting your creativity shine through.
Consider adding embellishments like small patches or decorative stitching to elevate the bandana’s charm, making it a standout accessory for walks or playdates.
Imagine your pet strutting around the neighborhood, turning heads with their fashionable bandana that showcases your love for crafting and your furry companion!
Fabric Scrap Pet Bandanas DIY Pets
Pamper your furry friend with a stylish fabric scrap bandana that’s as cute as it is eco-friendly! These little accessories not only look adorable but also reflect your pet’s personality.
Materials You’ll Need
- Fabric scraps (cotton works best)
- Scissors or rotary cutter
- Sewing machine or fabric glue
- Measuring tape
- Optional: patches, embroidery thread, or trims
Tip: Use colorful, patterned fabric for a cheerful look that will really pop on walks!
Step-by-Step Instructions
- Cut your fabric scraps into a large triangle shape that can tie comfortably around your pet’s neck.
- Hem the edges by sewing or gluing them down to prevent fraying.
- Add embellishments like patches, embroidery, or fun trims to personalize the bandana.
- Fold the top edge over slightly and sew to create a neat finish (optional).
- Gently tie the bandana around your pet’s neck, leaving enough room for comfort and safety.
Styling Ideas
- Mix and match fabrics for seasonal looks—florals in spring, plaids in fall.
- Create matching bandanas for pets and their owners.
- Add your pet’s name with embroidered letters for an extra personal touch.
Now your pet is ready to strut in style with their one-of-a-kind bandana, turning heads on every walk or playdate! 🐾
24. Fabric Scrap Garden Flags

Brighten up your outdoor space with whimsical garden flags made from fabric scraps, adding a personal touch to your garden or patio.
Cut your fabric into flag shapes, experimenting with different colors and patterns to create an eye-catching design that reflects your style. You can use a sewing machine to reinforce the edges and add a pocket for the flagpole, ensuring durability against the elements.
Consider adding personalized touches, like stenciled letters or fabric paint designs, to make each flag uniquely yours.
Visualize your garden adorned with these vibrant flags fluttering in the breeze, welcoming guests and showcasing your creativity while enhancing the outdoor atmosphere!
🌸 Fabric Scrap Garden Flags DIY Outdoor
Brighten up your garden or patio with whimsical fabric scrap garden flags that flutter in the breeze, adding personality and color to your outdoor space.
✨ Materials You’ll Need
- Assorted fabric scraps (cotton or linen recommended)
- Scissors or rotary cutter
- Sewing machine or fabric glue
- Bias tape or extra fabric for flagpole pocket
- Optional: stencils, fabric paint, or iron-on letters
Tip: Mix florals with solids or stripes for a playful, eye-catching effect that really pops outdoors!
🪡 Step-by-Step Instructions
- Cut your fabric scraps into flag shapes — triangles, rectangles, or swallowtail banners all work beautifully.
- Hem or glue the edges to prevent fraying, especially if your flags will be outdoors.
- Fold the top edge over to create a pocket for your flagpole or string and sew or glue in place.
- Slide your flags onto a dowel, string, or metal pole, spacing them evenly.
- Add personal touches such as stenciled letters, fabric paint, or appliqué to make each flag unique.
🌼 Styling Ideas
- Line your garden path with several flags for a festive welcome.
- Create themed flags for holidays, birthdays, or seasonal décor.
- Layer different fabric textures to give your flags a rich, handmade look.
- Hang one large flag as a garden centerpiece, or a set of smaller ones for charm.
These fabric scrap garden flags are not just eco-friendly and fun to make, but they’ll also add a burst of joy to every corner of your outdoor space. 🌿
25. Fabric Scrap Storage Bins

Organize your space with stylish fabric scrap storage bins that not only serve a practical purpose but also enhance your decor.
By sewing together sturdy fabric scraps, you can create bins of various sizes, perfect for holding everything from toys to craft supplies. Add a little personality with contrasting linings or decorative stitching to make them truly yours.
Consider incorporating handles for easy transport, allowing you to move your bins around as needed without hassle.
Imagine a beautifully organized room where your colorful fabric scrap storage bins add charm and organization to your space, transforming clutter into a visual delight!
Fabric Scrap Storage Bins DIY Organization
Organize your space with stylish fabric scrap storage bins that not only serve a practical purpose but also brighten your décor. Perfect for holding toys, craft supplies, or household odds and ends, these bins are a fun way to turn scraps into something useful.
Materials You’ll Need
- Sturdy fabric scraps (cotton or canvas work best)
- Interfacing or cardboard for structure
- Sewing machine or strong fabric glue
- Contrasting fabric for lining (optional)
- Handles (fabric strips, rope, or webbing)
- Thread, scissors, and sewing pins
Tip: Choose bold patterns for the outside and softer fabrics for the lining — it adds personality and makes the bins pop on your shelves!
Step-by-Step Instructions
- Cut your fabric scraps into panels (front, back, sides, and bottom) in the size you want your bin to be.
- Add interfacing or cardboard inside each panel for structure and sturdiness.
- Sew the panels together to form a cube or rectangle shape. If gluing, apply strong fabric adhesive along the edges.
- Attach a lining inside (optional) for a neater finish and extra strength.
- Sew or glue on fabric handles to make the bins easy to carry.
- Press the seams with an iron, and your colorful storage bin is ready to use!
Styling Ideas
- Mix floral, geometric, and solid scraps for a playful, patchwork look.
- Create matching sets of bins in different sizes for shelves or cubbies.
- Label each bin with fabric tags for added charm and organization.
Conclusion

With these 25 incredible fabric scrap crafts, you can transform leftover materials into delightful creations that enhance your home and life.
Embrace the art of upcycling and let your imagination run wild, knowing that every small project contributes to a more sustainable world.
Which fabric scrap craft will you try first?

Brother XM2701 Sewing Machine, Lightweight, Full Featured, 27 Stitches, 6 Included Feet
- 27 Unique built-in stitches: The XM2701 includes 27 built-in stitches including decorative, blind hem, zigzag, and stretch stitches and an auto-size…
- Automatic needle threader and drop-in top bobbin: This sewing machine includes an automatic needle threader that perfectly pushes the thread through…
- Included accessories: The XM2701 comes with 6 sewing feet, 3-piece needle set, twin needle, 4 bobbins, manual and more
Note: We aim to provide accurate product links, but some may occasionally expire or become unavailable. If this happens, please search directly on Amazon for the product or a suitable alternative.
This post contains Amazon affiliate links, meaning I may earn a small commission if you purchase through my links, at no extra cost to you.
FAQs About Fabric Scrap Crafts
What can I make with leftover fabric scraps?
So much! From patchwork pillows and bunting to coasters, bookmarks, wall art, and even upcycled tote bags—fabric scraps are perfect for turning waste into something beautiful and practical.
Are fabric scrap crafts beginner-friendly?
Absolutely. Many scrap projects are no-sew or involve simple hand stitching. If you’re just starting out, look for beginner sewing projects labeled “easy” or try glue-based crafts first.
What kind of fabric works best for scrap projects?
Lightweight cotton is the most versatile and easiest to work with, especially for beginners. But don’t toss old jeans, flannel, or linen—each can be used creatively depending on your project.
How do I organize and store my fabric scraps?
Sort them by size, color, or fabric type into bins or zip pouches. Label each container, and consider keeping a “quick project” basket nearby for spontaneous crafting sessions!
Can I sell items made from fabric scrap crafts?
Yes! Handmade, upcycled goods are popular at markets and on platforms like Etsy. Just be sure you’re using fabric you have the rights to, especially if it includes licensed prints.


You must be logged in to post a comment.